Friday, November 2, 2012

It's Pinspired Friday! {Headband Tutorial}

Happy Friday! It's time for...

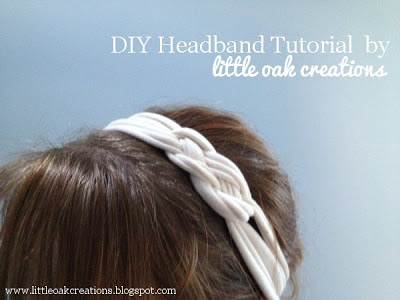
Today, I was inspired by this pin I added about a week or two ago... a super cute headband that I figured would look good on me, as well as on a baby. Plus, I'm a big fan of anything nautical, and this nautical type knot fit the bill.

Sorry, that was an excessively long picture. So I thought I would just click-a-roo on the image and it would magically take me to a beautifully written tutorial. Um, no such luck. I tried finding anything regarding this image and nothing. So I decided to wing it. Which usually doesn't work in my favor, but this time it all magically came together. Lucky for you, you don't have to wing it, you can follow my tutorial!

Start with a stretchy cotton shirt. Mine was a size large and it was 95% cotton and 5% spandex. The little bit of spandex really does help when you go to stretch it and wear it. And yes, this shirt had been used for a different project. You need to have some side seams or you'll have to seam your fabric into a tube. Side seams are just easier. My only side seams left were right at the armpit.
 So I cut about 1 1/2" to 2" piece...
 and then cut that in half.
Now, take your little pieces and stretch them out. They'll turn into little tube-like pieces. I was pretty excited about my yellow fabric but since it wasn't printed on the inside, they turned white like the inside of the shirt. Oh well. They stretched out into about a foot and a half. I didn't measure, I just figured it would stretch around my head. (Spoiler alert: it does end up fitting. whew.)
 So now it starts getting a bit tricky. Take 1 of your strips, and lay it out, then turn it into what I think looks similar to an awareness ribbon shape. You'll want your right side crossing on top of the left side. (See arrow)
 Take your other strip and make a "U" shape. Just lay it on top of the other shape.

 Then, take the piece being pointed at above, and place it on top of that piece of the "U" shape. You're not really shifting anything else besides that little piece in this step.
This is where I show off my noob blogging skills. I think I was so excited that I was actually getting it (!) that I didn't take a picture of this step, so I'm using the pinned picture. Take the left side of your "U" and place it behind the circular part. Your pieces will look sort of like an ampersand. (&) Sort of.
This is where it gets a little tricky, but follow with me here. Your piece that is kind of hanging out in la-la-land in the step above... grab that (1), place it over (2), then under (3), and have it come out the top. You can see in this step that it's coming together!

Now, carefully grab all four of the loops. You'll obviously use two hands (place your other hand where those arrows are), I had to use one hand for the camera and using your index and your thumb, pull the pieces away from each other. Your giant knot will tighten up and you'll be left with this! 

So now, cut out a little piece of fabric. This was about 1 1/2" to 2" square.
 Then, place your fabric down and one by one, place the flat part of the ends on the square. I tried both at the same time, it just didn't go as easy as one at a time.
 Wrap your ends like a little taco in the piece of fabric. The extra little spandex in this shirt made this easy, because I could pull on it to get it in place and completely covered. I put a pin in it so it'd stay.
 Take it over to your sewing machine (or, hot glue if you're not having any of that) and put a few stitches in it. I put two in.
Congratulations! You've successfully made a pretty sweet headband. This was an easy project, even with "winging it" and taking pictures along the way only took about 10 minutes or so. This would be a cute, easy gift!

Thanks for following along!

2 comments:

Friday, November 2, 2012

It's Pinspired Friday! {Headband Tutorial}

Happy Friday! It's time for...

Today, I was inspired by this pin I added about a week or two ago... a super cute headband that I figured would look good on me, as well as on a baby. Plus, I'm a big fan of anything nautical, and this nautical type knot fit the bill.

Sorry, that was an excessively long picture. So I thought I would just click-a-roo on the image and it would magically take me to a beautifully written tutorial. Um, no such luck. I tried finding anything regarding this image and nothing. So I decided to wing it. Which usually doesn't work in my favor, but this time it all magically came together. Lucky for you, you don't have to wing it, you can follow my tutorial!

Start with a stretchy cotton shirt. Mine was a size large and it was 95% cotton and 5% spandex. The little bit of spandex really does help when you go to stretch it and wear it. And yes, this shirt had been used for a different project. You need to have some side seams or you'll have to seam your fabric into a tube. Side seams are just easier. My only side seams left were right at the armpit.
 So I cut about 1 1/2" to 2" piece...
 and then cut that in half.
Now, take your little pieces and stretch them out. They'll turn into little tube-like pieces. I was pretty excited about my yellow fabric but since it wasn't printed on the inside, they turned white like the inside of the shirt. Oh well. They stretched out into about a foot and a half. I didn't measure, I just figured it would stretch around my head. (Spoiler alert: it does end up fitting. whew.)
 So now it starts getting a bit tricky. Take 1 of your strips, and lay it out, then turn it into what I think looks similar to an awareness ribbon shape. You'll want your right side crossing on top of the left side. (See arrow)
 Take your other strip and make a "U" shape. Just lay it on top of the other shape.

 Then, take the piece being pointed at above, and place it on top of that piece of the "U" shape. You're not really shifting anything else besides that little piece in this step.
This is where I show off my noob blogging skills. I think I was so excited that I was actually getting it (!) that I didn't take a picture of this step, so I'm using the pinned picture. Take the left side of your "U" and place it behind the circular part. Your pieces will look sort of like an ampersand. (&) Sort of.
This is where it gets a little tricky, but follow with me here. Your piece that is kind of hanging out in la-la-land in the step above... grab that (1), place it over (2), then under (3), and have it come out the top. You can see in this step that it's coming together!

Now, carefully grab all four of the loops. You'll obviously use two hands (place your other hand where those arrows are), I had to use one hand for the camera and using your index and your thumb, pull the pieces away from each other. Your giant knot will tighten up and you'll be left with this! 

So now, cut out a little piece of fabric. This was about 1 1/2" to 2" square.
 Then, place your fabric down and one by one, place the flat part of the ends on the square. I tried both at the same time, it just didn't go as easy as one at a time.
 Wrap your ends like a little taco in the piece of fabric. The extra little spandex in this shirt made this easy, because I could pull on it to get it in place and completely covered. I put a pin in it so it'd stay.
 Take it over to your sewing machine (or, hot glue if you're not having any of that) and put a few stitches in it. I put two in.
Congratulations! You've successfully made a pretty sweet headband. This was an easy project, even with "winging it" and taking pictures along the way only took about 10 minutes or so. This would be a cute, easy gift!

Thanks for following along!

2 comments:

Labels

Flickr Images

Like us on Facebook

Popular Posts


Little Oak Creations Template by Ipietoon Cute Blog Design

Blogger Templates