Showing posts with label healthy living. Show all posts

Wednesday, August 7, 2013

Savory Venison Skillet

Hi all!

Fall is right around the corner (yay or nay?) and that means lots of us will be (hopefully) enjoying venison soon. You might have heard that venison tastes game-y, or that it's tough... well, I had a package of ground venison tonight to use and let me just say, either this venison was not game-y, or this recipe just did a really, really good job of covering up any game-y taste. I think it may have been the later. It was really, really good.

Enter... the Savory Venison Skillet. 


So easy to make... and even though it looks like a hamburger helper dish, I used real cheese (not powder), and the taste is completely different from what it looks like... much less "cheesy" and more savory from the ketchup and Worcestershire. Because this only uses 7 basic ingredients, it's a great "clean out the fridge" meal, using what you most likely already have on hand.

You'll need:
1 pound ground venison

1 can (10 1/2 ounces) Condensed Cream of Celery Soup
1/2 cup water
1/4 cup ketchup
1 tablespoon Worcestershire sauce
2 cups frozen hash-brown potatoes
3 slices cheese (The original recipe called for process cheese, I call for sandwich slices of reduced fat 2% milk sharp cheddar. Mmm!)


First, cook the venison in a skillet over medium-high heat until well browned, stirring often to separate meat. Drain any fat and return it to the pan. I had very little fat... an awesome venison benefit.


Right on top of the meat, add the soup, water, ketchup and Worcestershire in the skillet, mix together and heat to a boil. 

It looks a bit like glop and eggs, but bear with me here.


Stir in the potatoes. Reduce the heat to low. Cover and cook for 10 minutes or until the potatoes are tender. Top with the cheese and serve! I added a hint of salt and pepper on top of mine and it was delicious!


I really am a fan of venison, and there actually are some health benefits - a few to touch on is that wild harvested deer have no added hormones, it's actually lower in fat than even a chicken breast (only 2% of it is fat... hence why not much of it was in my pan after browning!) AND lower in calories - a 4 oz. serving of venison has roughly 95 calories whereas a 4 oz. serving of pork or beef has well over 300 calories per serving. Check out Michigan Venison for more health benefits. I didn't know most of them before I looked them up for this post!

Did you enjoy this recipe? Or do you have any other venison recipes? I have some venison sausage and venison steak in the freezer that I can't wait to try out!


Friday, April 26, 2013

It's Pinspired Friday! {Sweet Potato Shepherd's Pie}

Happy Friday all! It's Pinspired Friday!


Let's talk about healthy dinners today. Dinners are one of those things that can be completely based on mood. You know what is nice sometimes? Getting your cooking out of the way so that tomorrow, you can reheat and still have an awesome meal that doesn't taste reheated. In fact, I completely recommend that you make this one a day before you want to eat it and then don't touch it until tomorrow. It's kind of like a pan of lasgana - better the next day, as it gives all of the flavors time to settle and come together (or so they tell me, I hate lasgana. haha!) But really. Make this one today and eat it tomorrow. When it comes time to figure out what to make tomorrow for dinner... you'll thank me. ;)

It all started when I ran across this recipe from Skinnytaste.com.

http://www.skinnytaste.com/2012/11/sweet-potato-turkey-shepards-pie.html
I was able to modify her original recipe to get rid of all of the dairy, and also to modify it more with what I usually have in the pantry and freezer (I can't say I ever have parsnips!), and it still tastes great!

So let's gather our ingredients. This will make plenty for two people.

• 2 small sweet potatoes/yams
• 3 tablespoons of minced garlic - I use the kind that is in a jar, it saves a bit of time.
• 1 3/4 cup of chicken broth
• 1 lb of ground turkey
• 1 tsp of olive oil
• Onion powder
• 10 oz of mixed vegetables. I use the green bean, corn, carrot, and pea mix from Meijer.
• 2 tbsp of flour
• 1 tsp Worcestershire sauce
• 1/4 tsp rosemary
• Salt and Pepper to taste
• Optional: paprika


Preheat your oven to 400.

Get a pot of salted water going until boiling, you'll want enough water to completely cover your sweet potato chunks. Add 1/4 cup of chicken broth to the water and 1 1/2 tablespoons of minced garlic. Peel and chop your sweet potatoes, and add the sweet potatoes to the boiling water. Cook until soft, about 20-25 minutes. Drain and mash. Sprinkle a little salt and pepper over your sweet potato mash, set aside. I usually mash right in the colander and let it sit in there until it's needed again.

This is the garlic I use!

In the same pan you used for the sweet potatoes, cook your ground turkey until browned, season with salt and pepper. Once cooked, drain and set aside on plate.


In that same pot, add your olive oil and saute the remaining 1 1/2 tablespoon of minced garlic with a generous amount of onion powder. Saute for a few minutes, until some garlic pieces brown. Add your flour, salt and pepper (yes, this recipe takes quite a bit of both), remaining 1 1/2 cup of chicken broth, Worcestershire sauce, and rosemary. Mix well. Add your frozen vegetables and cooked turkey, mix. Let simmer for 5-7 minutes.


While the mixture is simmering, spray a 2.5L glass dish with cooking spray or oil of your choice. After the mixture has simmered, add the mixture to the bottom of the dish, and top it with the sweet potatoes.


You can add paprika here if you want, but I leave it out. Bake for 15 minutes. Let it cool for 10 minutes or so, then put tinfoil on top of the entire pan and put it in the refrigerator. Enjoy... tomorrow! :) You can eat it the same day, but I prefer the taste the next day.


I hope you enjoyed this recipe! :) It's nice to be able to modify something to your tastes and what you have in your pantry, AND have it taste great.


Share it with your friends! Thank you for following along and have a great weekend!


Friday, April 12, 2013

It's Pinspired Friday! {Skinny Chocolate Chip Banana Bread}

Hi all! It's Pinspired Friday!


Today, I'm inspired by this pin from Skinnymom.com.

Skinny Chocolate Chip Banana Bread from Skinnymom.com
And here's what I came up with:


It all started when I had a banana on my toast with some peanut butter this morning and I realized the bananas were starting to look a little sad. And brown. Which only means one thing... it's banana bread time.

But I wanted to continue eating healthy, so off to Pinterest I went in search of a recipe and found this one by Skinnymom. So I gathered my ingredients and gave the recipe a once over to make sure I had everything, or could substitute things that I didn't have.

At first glance, the recipe seemed a little... off. First, we're cooking at 330 degrees, which... okay. It's just an odd temperature. As I'm mixing though, it feels like I'm making a lot... then I notice in direction #9 that it's because the recipe is for 2 loaves. Oy. That's what I get for skimming! (In the end, the mixture really only made enough mix for about a 2/3 full size loaf pan. So if you want two short loaves, go for it, but I put it all in one.). Then... as I'm skimming, I'm making a metal list of the gadgets and bowls I'll need... and I read it as needing four separate bowls for mixing all of the ingredients!

This is kind of how I felt at that point.


Luckily, I actually read (reading is fundamental!) and realized she called for three separate bowls. But, if you've been reading my blog for any length of time, I'm not a fan of extra or unnecessary bowls and dishes when prepping food. So I got it down to two. I could have probably done even just one bowl... but I was photographing it for the blog and wanted to make sure it turned out. Ha!

So let's make some chocolate chip banana bread, shall we?
You'll need:

• 2 1/2 - 3 very ripe bananas (I used 2.5)
• 6 oz of vanilla fat free yogurt
• 1 tbsp of I can't believe it's not butter spread, or similar
• 2 egg whites (I used one full egg and 1 egg white)
• 1 1/2 cup unbleached flour (doesn't matter if bleached or unbleached, but has to be all purpose)
• 1 tsp salt
• 1 tsp baking powder
• 1 tsp baking soda
• 1/2 cup brown sugar
• 1/2 cup splenda granulated sugar (I use about half and half real sugar and splenda, or 1/4 cup of each)
• 1 tsp vanilla extract
• 1/3 cup semi-sweet chocolate chips

First off, preheat your oven to 330 degrees, if you're making two small loaves. Otherwise, preheat your oven to 350 for one big loaf. I did the 330 for 1 big loaf and it ended up taking about 45-50 minutes for it to (finally) cook through, along with about 10 minutes using the convection cooking option on my oven... toooo long.

Grease up your loaf pan (or two) with non-stick spray or Crisco.

In a bowl, mash up your bananas. Make sure you're using a bowl big enough for other ingredients. Once you've got them smashed, kind of push them up on the side of the bowl. I'm helping eliminate an extra dish to wash here. ;)

Add the butter/spread, yogurt, vanilla extract, brown sugar and splenda/sugar. Mix those together, trying to avoid mixing in the banana mash initially.


Then, mix the bananas in, along with the egg whites.


Now, in a separate bowl (you can be a rebel here if you want and use the same bowl, I would imagine), add the flour, salt, baking soda, and baking powder. Mix.


Now, add the flour mix to the liquid mix. Mix together until blended, but take care not to overmix as it is a very heavy, dense mix. Then, add your chocolate chips.

Transfer the mixture into either a) two loaf pans, which will probably be about 1/3 full in each loaf pan) or b) in one loaf pan. I'm doing one loaf, and you'll see that the loaf pan is about 2/3 of the way full.


For one loaf - bake at 350 for 25 minutes, checking on it in the last 5-10 minutes. You may require more time or less.

For two loaves - bake at 330 for 30-35 minutes, checking in on them in the last 5-10 minutes.

When a butter knife comes out clean, the banana bread is done! :) Sometimes you'll hit a chocolate chip, so it may take multiple times to figure out if the bread is actually done.


And there you have it! As you can see, the middle of mine caved as it was not cooking as evenly as the outside - but it still tastes awesome. :) The yogurt is such a great idea for dropping almost all of the butter and you truly cannot taste the difference. I was pleased that this had such a great taste, especially with using Splenda, as I have had little luck in getting my "desserts" tasting like anything besides plastic when using Splenda only. Of course, because I used half splenda, half sugar it brings the calories up just a bit.


Enjoy!

I'm linking up with these parties!

Friday, April 5, 2013

It's Pinspired Friday! {Green Tea Mango Smoothies}

Good morning all!

I am happy to report that a) I am down 2 pants/skirts sizes as of yesterday. I had a sudden BURST of energy yesterday and switched out all of the winter clothes with my spring clothes... and I also decided to try on everything that did not fit last summer, or I've been holding on to in the hopes of fitting into again someday. I tried on a skirt that I bought in college that hasn't fit me for a long time, and sure enough... it fit. I was and am pretty dang excited. All of my shorts and capris that didn't fit last summer, now fit too. It was a really, really good feeling. I'm also happy to report that b) It's opening day for the Detroit Tigers (go Tigers!) and c) It's Pinspired Friday!


It all started when I ran across this pin:

From WhoSay.com - http://www.whosay.com/joybauer/photos/233971
The pin was for a green tea mango smoothie, with a promise of yummy and energy, both of which I enjoy. I had all the ingredients on hand, so I decided to give it a try. And you should too!


You'll need:
• 1 Green tea teabag, to be steeped in 6 oz. of water
• 1/2 cup of nonfat/fat free vanilla yogurt
• 1 cup of frozen mango chunks, unsweetened
• Not pictured - 7 ice cubes
• Not pictured - 1 packet of splenda

You'll also want:
• a blender
• a Pyrex or similar measuring cup to get the water boiling/hot

First, measure out 6 oz. of water in your measuring cup, and microwave it for about 3 minutes or until hot/near boiling. Stick your green tea bag in there after the water is ready.


We want the water to become quite saturated with the green tea, so let it sit for about 5 minutes.


As the tea is steeping, measure out your one cup of frozen mango:


Add the mango the blender, add your 1/2 cup of nonfat vanilla yogurt, add the green tea, add the packet of splenda and the ice cubes.

Add your blender top before blending, obviously... haha
Blend until all chunks are broken down and the mixture is smooth.


And enjoy! This recipe makes one glass full (these glasses are full size, I believe in the 14-16 oz range). The color is gorgeous, almost like an orange juice color but more yellow, and the taste is great! I was unsure if I was going to care for it as I usually don't care for green tea (I prefer black tea or even better, white tea) but the combination of the exotic taste of mango and the green tea work together really well. The original pin I got this front said the glass had 190 calories... not bad for breakfast! :) Thanks for following along!

I'm linking up to these parties!
Thrifty Decor Chick

Friday, March 22, 2013

It's Pinspired Friday! {Sweet Potato Hash Browns}

It's Friday, so that only means two things: the weekend is here...and more importantly, it's time for Pinspired Friday. ;)

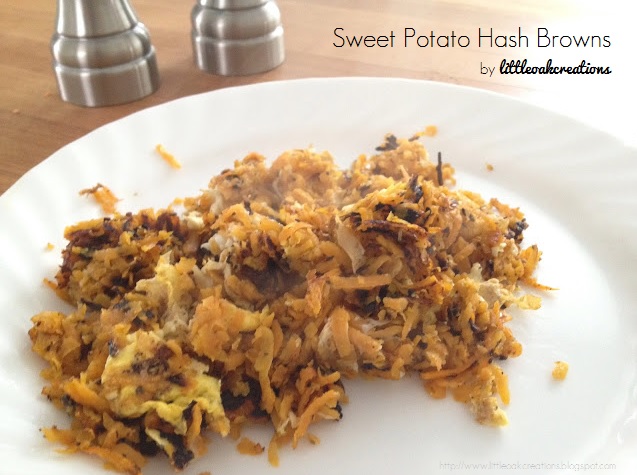
The steam made for kind of a crappy picture... but I ate them too fast to retake. ;)


Today, we're making sweet potato hash browns. If you haven't been reading lately (don't break my heart!), we've been following Bob Harper's "The Skinny Rules" as our new way of life/diet. In his book, he has a recipe for sweet potato hash browns. I was looking for something yummy to serve our lovely house guests this weekend for breakfast... and I remembered the recipe for sweet potato hash browns in the book.

Fast forward a little bit... and I'm mildly confused. By reading through the recipe, it's clearly not for hashbrowns, but rather sweet potato home fries if anything... it was just cubed sweet potatoes. And if you've ever cooked sweet potatoes, you know they take a long time to cook. Cue sad face.  A quick search around Pinterest brought me to these actual, sweet potato hash browns.

Sweet Potato Hash Browns from nomnompaleo
Here is the biggest plus about these... other than the fact that they taste amazing and are lower calorie, and paleo diet approved - they take only a few minutes to cook! Because you shred them small, they cook way faster. Like less than ten minutes. That's my kinda food!

Not pictured... an egg (optional!)

So let's make you some! Here's what you'll need.
• 1 sweet potato. I used a really small one (like 2" wide and maybe 6" long) and it is plenty for one person, could be two small portions.
• olive oil
• salt
• black pepper
• onion powder
• garlic powder
• Herbs De Provence - these are the kicker - these give this dish a totally unmatched flavor. Herbs De Provence is a mix of basil, marjoram, thyme, sage, savory, and rosemary.
• An egg (optional)

You'll also want:
• A stovetop
• A frying pan with lid.
• A peeler and a grater or food processor with julienne setting.


First, get some oil to shimmering in a fry pan. I just eyeballed this - I wanted enough to give my sweet potatoes a little crisp and not stick to the pan.


Peel and shred your sweet potato. That little potato made all of this!

Attempt not to maim yourself with the shredder. Nice job.


Now, place your shredded sweet potatoes in the pan, they'll sizzle a little and immediately start turning a different shade of orange. Top them with the salt, pepper, herbs de provence, garlic powder and onion powder. With a spatula, flip them and mix them so they all get a bit of spice and start cooking.

Place your lid on top and let them cook a little. Don't be like me and walk away... otherwise the crispy parts become burnt, and it's not the same.

They'll turn a different shade of orange as they cook, and you want them to cook to the bottom a little so they get crispy but not burnt, so watch them carefully.


Remove some of the burnt pieces and toss them. Whoops. If you want, you can crack an egg at this point in the same pan and mix it in with the sweet potato. OMG. So good.

Remove them to plate when your egg is sufficiently cooked to your liking, or if you're not doing an egg, you can remove them pretty shortly after they turn all the same color and are slightly mushy and slightly crispy.


Aww yeah, so good. Serve them right away, as they get cold quick and they taste best when warm.

Thanks for following along!

I'm linking up to these parties!


Tuesday, March 19, 2013

Green Apple, Cranraisin and Feta Salad + Saving Money

Let's talk salad. And dolla' dolla' bills ya'll.

Sometimes, there is nothing that sounds better to me than a BFS. BFS stands for Big F-bombin' Salad, and it's a term we use pretty frequently around the LOC household, especially with our new diet/lifestyle change.

I wanted to share a recipe (Recipe? Maybe just a good combination) for a salad I made a few days back. When you follow "The Skinny Rules", you are supposed to eat an apple a day, but you're supposed to have no/low carbs after lunch, so I always try to eat my apple at about 10:30 or with lunch. This time, I decided to make the apple part of my lunch.


Pretty isn't it? :) I think it looks like one of those salads you'll pay 8 bucks for at a restaurant and then wonder that while it was amazingly yummy, why you just paid 8 bucks for a salad. You can make it at home and have a few more bucks in your pocket.

Here's what you'll need:

• 1 head of romaine lettuce, or a lettuce or spinach of your choice. We got a three pack for 3 bucks, so $1.
• A bag of cranraisins (use sparingly - they are higher in calories) - We got a pack for about 2.50-3 bucks, so you'll be using just cents of that bag on this salad. We'll say maybe .25 cents for easy math.
• 1 green apple, cut up. - We bought a big bag for $4.99 and used one - so let's use .50 cents for easy math.
• 1-2 tbsp of feta cheese. - Tip: check out the feta in the back with the other cheeses over the cheeses in the front with the fancy cheeses and hummus', etc. It'll be cheaper in the back. We paid about 3 bucks for a tub of it. Let's say about .75 cents of it was used on the salad.

So math.... $2.50 for this whole salad. And when you use a whole head of lettuce, it's definitely plenty for two people... so $1.25 per person. You can't beat that! :) If you use dressing, you'd have to factor in that cost too, but my guess is that it'll still be less than the restaurant price. I used just a hint of lite Italian and ranch mixed together. It was amazing, plus cheap, plus healthy.

Give it a try and let me know how it turned out for you!


Friday, March 15, 2013

It's Pinspired Friday! {Chocolate Frozen Yogurt}

I say this every week... but really, can you believe it's Friday again? Already? Let's chat about Chocolate Frozen Yogurt today.


If you look at the history of this blog, you know I'm a fan of sweets. As in, I love sugar. Part of this new diet/lifestyle change is really reducing your sugar intake, and he really wants us to stay away from artificial sweeteners. Bob, I love all of your other suggestions...but this one has been toughest for me. Getting rid of soda/pop - fine, we don't drink it anyway (which impressed my dentist yesterday, btw. Lighten up on the pop for smaller waistlines AND better teeth. Go figure). Have an apple a day? Okay, I heart apples so I can do that. But sugar...? Bobbbbbb...*whine*

I know I have to cut it out though if I want to lose anything, so I did. For the most part. We bought Greek yogurt plain, and I have to put a little Splenda in it. It's just too bitter otherwise for me, as in FULL BODY REJECTION to the taste and texture. Blergh. Makes me shiver just thinking about it. 

So when I ran across this pin (actually, I think I pinned it from my sister-in-law. Thanks girl! :) I wanted to give it a try because I really do want to like Greek yogurt. I want to give it a chance and man, did I want some chocolate.

Rich Chocolate Protein FroYo from Muffin-Topless (haha, love that name)
I am happy to report - it wasn't bad. At all. In fact, it was pretty dang good. Of course, I made a few modifications... but they're along the same line and idea as Muffin-Topless.

Want to make some? Here's what you'll need.

• 6 oz. (a little less than a cup... I used about half of the container and it was plenty for Mr. LOC and I to share) of Greek Yogurt, plain.
• 2 Tablespoons of baking cocoa
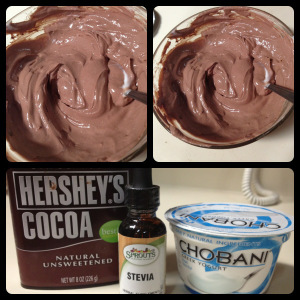
• 3 packets of Splenda (I didn't have Stevia... and even though I'm only showing 2 packets, it needed 3)
• A dash of vanilla extract

I added the vanilla extract to the recipe, as it was still lacking after mixing up the other ingredients. If you use the vanilla flavored Greek Yogurt, you can omit this step.


Add your Greek yogurt to a bowl. I recommend using glass like Corelle so you don't get that plastic-y taste after you freeze it later. Nothing worse than plastic-y tasting sort-of ice cream (plus, that plastic taste is not good for you!)


Add the 2 tablespoons of baking cocoa, the three packets of Splenda, and the dash of vanilla. Mix thoroughly.

Take out the spoon, cling-wrap it and toss it in the freezer. It's an easy low calorie "dessert" at night!

Hope you enjoy! Let me know how this turned out for you! Spring is just around the corner (thank God). Next week I've got a salad recipe you won't want to miss and another offer for the Etsy store just for my loyal readers! See you then!
I'm linking up to these parties!
Showing posts with label healthy living. Show all posts

Wednesday, August 7, 2013

Savory Venison Skillet

Hi all!

Fall is right around the corner (yay or nay?) and that means lots of us will be (hopefully) enjoying venison soon. You might have heard that venison tastes game-y, or that it's tough... well, I had a package of ground venison tonight to use and let me just say, either this venison was not game-y, or this recipe just did a really, really good job of covering up any game-y taste. I think it may have been the later. It was really, really good.

Enter... the Savory Venison Skillet. 


So easy to make... and even though it looks like a hamburger helper dish, I used real cheese (not powder), and the taste is completely different from what it looks like... much less "cheesy" and more savory from the ketchup and Worcestershire. Because this only uses 7 basic ingredients, it's a great "clean out the fridge" meal, using what you most likely already have on hand.

You'll need:
1 pound ground venison

1 can (10 1/2 ounces) Condensed Cream of Celery Soup
1/2 cup water
1/4 cup ketchup
1 tablespoon Worcestershire sauce
2 cups frozen hash-brown potatoes
3 slices cheese (The original recipe called for process cheese, I call for sandwich slices of reduced fat 2% milk sharp cheddar. Mmm!)


First, cook the venison in a skillet over medium-high heat until well browned, stirring often to separate meat. Drain any fat and return it to the pan. I had very little fat... an awesome venison benefit.


Right on top of the meat, add the soup, water, ketchup and Worcestershire in the skillet, mix together and heat to a boil. 

It looks a bit like glop and eggs, but bear with me here.


Stir in the potatoes. Reduce the heat to low. Cover and cook for 10 minutes or until the potatoes are tender. Top with the cheese and serve! I added a hint of salt and pepper on top of mine and it was delicious!


I really am a fan of venison, and there actually are some health benefits - a few to touch on is that wild harvested deer have no added hormones, it's actually lower in fat than even a chicken breast (only 2% of it is fat... hence why not much of it was in my pan after browning!) AND lower in calories - a 4 oz. serving of venison has roughly 95 calories whereas a 4 oz. serving of pork or beef has well over 300 calories per serving. Check out Michigan Venison for more health benefits. I didn't know most of them before I looked them up for this post!

Did you enjoy this recipe? Or do you have any other venison recipes? I have some venison sausage and venison steak in the freezer that I can't wait to try out!


Friday, April 26, 2013

It's Pinspired Friday! {Sweet Potato Shepherd's Pie}

Happy Friday all! It's Pinspired Friday!


Let's talk about healthy dinners today. Dinners are one of those things that can be completely based on mood. You know what is nice sometimes? Getting your cooking out of the way so that tomorrow, you can reheat and still have an awesome meal that doesn't taste reheated. In fact, I completely recommend that you make this one a day before you want to eat it and then don't touch it until tomorrow. It's kind of like a pan of lasgana - better the next day, as it gives all of the flavors time to settle and come together (or so they tell me, I hate lasgana. haha!) But really. Make this one today and eat it tomorrow. When it comes time to figure out what to make tomorrow for dinner... you'll thank me. ;)

It all started when I ran across this recipe from Skinnytaste.com.

http://www.skinnytaste.com/2012/11/sweet-potato-turkey-shepards-pie.html
I was able to modify her original recipe to get rid of all of the dairy, and also to modify it more with what I usually have in the pantry and freezer (I can't say I ever have parsnips!), and it still tastes great!

So let's gather our ingredients. This will make plenty for two people.

• 2 small sweet potatoes/yams
• 3 tablespoons of minced garlic - I use the kind that is in a jar, it saves a bit of time.
• 1 3/4 cup of chicken broth
• 1 lb of ground turkey
• 1 tsp of olive oil
• Onion powder
• 10 oz of mixed vegetables. I use the green bean, corn, carrot, and pea mix from Meijer.
• 2 tbsp of flour
• 1 tsp Worcestershire sauce
• 1/4 tsp rosemary
• Salt and Pepper to taste
• Optional: paprika


Preheat your oven to 400.

Get a pot of salted water going until boiling, you'll want enough water to completely cover your sweet potato chunks. Add 1/4 cup of chicken broth to the water and 1 1/2 tablespoons of minced garlic. Peel and chop your sweet potatoes, and add the sweet potatoes to the boiling water. Cook until soft, about 20-25 minutes. Drain and mash. Sprinkle a little salt and pepper over your sweet potato mash, set aside. I usually mash right in the colander and let it sit in there until it's needed again.

This is the garlic I use!

In the same pan you used for the sweet potatoes, cook your ground turkey until browned, season with salt and pepper. Once cooked, drain and set aside on plate.


In that same pot, add your olive oil and saute the remaining 1 1/2 tablespoon of minced garlic with a generous amount of onion powder. Saute for a few minutes, until some garlic pieces brown. Add your flour, salt and pepper (yes, this recipe takes quite a bit of both), remaining 1 1/2 cup of chicken broth, Worcestershire sauce, and rosemary. Mix well. Add your frozen vegetables and cooked turkey, mix. Let simmer for 5-7 minutes.


While the mixture is simmering, spray a 2.5L glass dish with cooking spray or oil of your choice. After the mixture has simmered, add the mixture to the bottom of the dish, and top it with the sweet potatoes.


You can add paprika here if you want, but I leave it out. Bake for 15 minutes. Let it cool for 10 minutes or so, then put tinfoil on top of the entire pan and put it in the refrigerator. Enjoy... tomorrow! :) You can eat it the same day, but I prefer the taste the next day.


I hope you enjoyed this recipe! :) It's nice to be able to modify something to your tastes and what you have in your pantry, AND have it taste great.


Share it with your friends! Thank you for following along and have a great weekend!


Friday, April 12, 2013

It's Pinspired Friday! {Skinny Chocolate Chip Banana Bread}

Hi all! It's Pinspired Friday!


Today, I'm inspired by this pin from Skinnymom.com.

Skinny Chocolate Chip Banana Bread from Skinnymom.com
And here's what I came up with:


It all started when I had a banana on my toast with some peanut butter this morning and I realized the bananas were starting to look a little sad. And brown. Which only means one thing... it's banana bread time.

But I wanted to continue eating healthy, so off to Pinterest I went in search of a recipe and found this one by Skinnymom. So I gathered my ingredients and gave the recipe a once over to make sure I had everything, or could substitute things that I didn't have.

At first glance, the recipe seemed a little... off. First, we're cooking at 330 degrees, which... okay. It's just an odd temperature. As I'm mixing though, it feels like I'm making a lot... then I notice in direction #9 that it's because the recipe is for 2 loaves. Oy. That's what I get for skimming! (In the end, the mixture really only made enough mix for about a 2/3 full size loaf pan. So if you want two short loaves, go for it, but I put it all in one.). Then... as I'm skimming, I'm making a metal list of the gadgets and bowls I'll need... and I read it as needing four separate bowls for mixing all of the ingredients!

This is kind of how I felt at that point.


Luckily, I actually read (reading is fundamental!) and realized she called for three separate bowls. But, if you've been reading my blog for any length of time, I'm not a fan of extra or unnecessary bowls and dishes when prepping food. So I got it down to two. I could have probably done even just one bowl... but I was photographing it for the blog and wanted to make sure it turned out. Ha!

So let's make some chocolate chip banana bread, shall we?
You'll need:

• 2 1/2 - 3 very ripe bananas (I used 2.5)
• 6 oz of vanilla fat free yogurt
• 1 tbsp of I can't believe it's not butter spread, or similar
• 2 egg whites (I used one full egg and 1 egg white)
• 1 1/2 cup unbleached flour (doesn't matter if bleached or unbleached, but has to be all purpose)
• 1 tsp salt
• 1 tsp baking powder
• 1 tsp baking soda
• 1/2 cup brown sugar
• 1/2 cup splenda granulated sugar (I use about half and half real sugar and splenda, or 1/4 cup of each)
• 1 tsp vanilla extract
• 1/3 cup semi-sweet chocolate chips

First off, preheat your oven to 330 degrees, if you're making two small loaves. Otherwise, preheat your oven to 350 for one big loaf. I did the 330 for 1 big loaf and it ended up taking about 45-50 minutes for it to (finally) cook through, along with about 10 minutes using the convection cooking option on my oven... toooo long.

Grease up your loaf pan (or two) with non-stick spray or Crisco.

In a bowl, mash up your bananas. Make sure you're using a bowl big enough for other ingredients. Once you've got them smashed, kind of push them up on the side of the bowl. I'm helping eliminate an extra dish to wash here. ;)

Add the butter/spread, yogurt, vanilla extract, brown sugar and splenda/sugar. Mix those together, trying to avoid mixing in the banana mash initially.


Then, mix the bananas in, along with the egg whites.


Now, in a separate bowl (you can be a rebel here if you want and use the same bowl, I would imagine), add the flour, salt, baking soda, and baking powder. Mix.


Now, add the flour mix to the liquid mix. Mix together until blended, but take care not to overmix as it is a very heavy, dense mix. Then, add your chocolate chips.

Transfer the mixture into either a) two loaf pans, which will probably be about 1/3 full in each loaf pan) or b) in one loaf pan. I'm doing one loaf, and you'll see that the loaf pan is about 2/3 of the way full.


For one loaf - bake at 350 for 25 minutes, checking on it in the last 5-10 minutes. You may require more time or less.

For two loaves - bake at 330 for 30-35 minutes, checking in on them in the last 5-10 minutes.

When a butter knife comes out clean, the banana bread is done! :) Sometimes you'll hit a chocolate chip, so it may take multiple times to figure out if the bread is actually done.


And there you have it! As you can see, the middle of mine caved as it was not cooking as evenly as the outside - but it still tastes awesome. :) The yogurt is such a great idea for dropping almost all of the butter and you truly cannot taste the difference. I was pleased that this had such a great taste, especially with using Splenda, as I have had little luck in getting my "desserts" tasting like anything besides plastic when using Splenda only. Of course, because I used half splenda, half sugar it brings the calories up just a bit.


Enjoy!

I'm linking up with these parties!

Friday, April 5, 2013

It's Pinspired Friday! {Green Tea Mango Smoothies}

Good morning all!

I am happy to report that a) I am down 2 pants/skirts sizes as of yesterday. I had a sudden BURST of energy yesterday and switched out all of the winter clothes with my spring clothes... and I also decided to try on everything that did not fit last summer, or I've been holding on to in the hopes of fitting into again someday. I tried on a skirt that I bought in college that hasn't fit me for a long time, and sure enough... it fit. I was and am pretty dang excited. All of my shorts and capris that didn't fit last summer, now fit too. It was a really, really good feeling. I'm also happy to report that b) It's opening day for the Detroit Tigers (go Tigers!) and c) It's Pinspired Friday!


It all started when I ran across this pin:

From WhoSay.com - http://www.whosay.com/joybauer/photos/233971
The pin was for a green tea mango smoothie, with a promise of yummy and energy, both of which I enjoy. I had all the ingredients on hand, so I decided to give it a try. And you should too!


You'll need:
• 1 Green tea teabag, to be steeped in 6 oz. of water
• 1/2 cup of nonfat/fat free vanilla yogurt
• 1 cup of frozen mango chunks, unsweetened
• Not pictured - 7 ice cubes
• Not pictured - 1 packet of splenda

You'll also want:
• a blender
• a Pyrex or similar measuring cup to get the water boiling/hot

First, measure out 6 oz. of water in your measuring cup, and microwave it for about 3 minutes or until hot/near boiling. Stick your green tea bag in there after the water is ready.


We want the water to become quite saturated with the green tea, so let it sit for about 5 minutes.


As the tea is steeping, measure out your one cup of frozen mango:


Add the mango the blender, add your 1/2 cup of nonfat vanilla yogurt, add the green tea, add the packet of splenda and the ice cubes.

Add your blender top before blending, obviously... haha
Blend until all chunks are broken down and the mixture is smooth.


And enjoy! This recipe makes one glass full (these glasses are full size, I believe in the 14-16 oz range). The color is gorgeous, almost like an orange juice color but more yellow, and the taste is great! I was unsure if I was going to care for it as I usually don't care for green tea (I prefer black tea or even better, white tea) but the combination of the exotic taste of mango and the green tea work together really well. The original pin I got this front said the glass had 190 calories... not bad for breakfast! :) Thanks for following along!

I'm linking up to these parties!
Thrifty Decor Chick

Friday, March 22, 2013

It's Pinspired Friday! {Sweet Potato Hash Browns}

It's Friday, so that only means two things: the weekend is here...and more importantly, it's time for Pinspired Friday. ;)

The steam made for kind of a crappy picture... but I ate them too fast to retake. ;)


Today, we're making sweet potato hash browns. If you haven't been reading lately (don't break my heart!), we've been following Bob Harper's "The Skinny Rules" as our new way of life/diet. In his book, he has a recipe for sweet potato hash browns. I was looking for something yummy to serve our lovely house guests this weekend for breakfast... and I remembered the recipe for sweet potato hash browns in the book.

Fast forward a little bit... and I'm mildly confused. By reading through the recipe, it's clearly not for hashbrowns, but rather sweet potato home fries if anything... it was just cubed sweet potatoes. And if you've ever cooked sweet potatoes, you know they take a long time to cook. Cue sad face.  A quick search around Pinterest brought me to these actual, sweet potato hash browns.

Sweet Potato Hash Browns from nomnompaleo
Here is the biggest plus about these... other than the fact that they taste amazing and are lower calorie, and paleo diet approved - they take only a few minutes to cook! Because you shred them small, they cook way faster. Like less than ten minutes. That's my kinda food!

Not pictured... an egg (optional!)

So let's make you some! Here's what you'll need.
• 1 sweet potato. I used a really small one (like 2" wide and maybe 6" long) and it is plenty for one person, could be two small portions.
• olive oil
• salt
• black pepper
• onion powder
• garlic powder
• Herbs De Provence - these are the kicker - these give this dish a totally unmatched flavor. Herbs De Provence is a mix of basil, marjoram, thyme, sage, savory, and rosemary.
• An egg (optional)

You'll also want:
• A stovetop
• A frying pan with lid.
• A peeler and a grater or food processor with julienne setting.


First, get some oil to shimmering in a fry pan. I just eyeballed this - I wanted enough to give my sweet potatoes a little crisp and not stick to the pan.


Peel and shred your sweet potato. That little potato made all of this!

Attempt not to maim yourself with the shredder. Nice job.


Now, place your shredded sweet potatoes in the pan, they'll sizzle a little and immediately start turning a different shade of orange. Top them with the salt, pepper, herbs de provence, garlic powder and onion powder. With a spatula, flip them and mix them so they all get a bit of spice and start cooking.

Place your lid on top and let them cook a little. Don't be like me and walk away... otherwise the crispy parts become burnt, and it's not the same.

They'll turn a different shade of orange as they cook, and you want them to cook to the bottom a little so they get crispy but not burnt, so watch them carefully.


Remove some of the burnt pieces and toss them. Whoops. If you want, you can crack an egg at this point in the same pan and mix it in with the sweet potato. OMG. So good.

Remove them to plate when your egg is sufficiently cooked to your liking, or if you're not doing an egg, you can remove them pretty shortly after they turn all the same color and are slightly mushy and slightly crispy.


Aww yeah, so good. Serve them right away, as they get cold quick and they taste best when warm.

Thanks for following along!

I'm linking up to these parties!


Tuesday, March 19, 2013

Green Apple, Cranraisin and Feta Salad + Saving Money

Let's talk salad. And dolla' dolla' bills ya'll.

Sometimes, there is nothing that sounds better to me than a BFS. BFS stands for Big F-bombin' Salad, and it's a term we use pretty frequently around the LOC household, especially with our new diet/lifestyle change.

I wanted to share a recipe (Recipe? Maybe just a good combination) for a salad I made a few days back. When you follow "The Skinny Rules", you are supposed to eat an apple a day, but you're supposed to have no/low carbs after lunch, so I always try to eat my apple at about 10:30 or with lunch. This time, I decided to make the apple part of my lunch.


Pretty isn't it? :) I think it looks like one of those salads you'll pay 8 bucks for at a restaurant and then wonder that while it was amazingly yummy, why you just paid 8 bucks for a salad. You can make it at home and have a few more bucks in your pocket.

Here's what you'll need:

• 1 head of romaine lettuce, or a lettuce or spinach of your choice. We got a three pack for 3 bucks, so $1.
• A bag of cranraisins (use sparingly - they are higher in calories) - We got a pack for about 2.50-3 bucks, so you'll be using just cents of that bag on this salad. We'll say maybe .25 cents for easy math.
• 1 green apple, cut up. - We bought a big bag for $4.99 and used one - so let's use .50 cents for easy math.
• 1-2 tbsp of feta cheese. - Tip: check out the feta in the back with the other cheeses over the cheeses in the front with the fancy cheeses and hummus', etc. It'll be cheaper in the back. We paid about 3 bucks for a tub of it. Let's say about .75 cents of it was used on the salad.

So math.... $2.50 for this whole salad. And when you use a whole head of lettuce, it's definitely plenty for two people... so $1.25 per person. You can't beat that! :) If you use dressing, you'd have to factor in that cost too, but my guess is that it'll still be less than the restaurant price. I used just a hint of lite Italian and ranch mixed together. It was amazing, plus cheap, plus healthy.

Give it a try and let me know how it turned out for you!


Friday, March 15, 2013

It's Pinspired Friday! {Chocolate Frozen Yogurt}

I say this every week... but really, can you believe it's Friday again? Already? Let's chat about Chocolate Frozen Yogurt today.


If you look at the history of this blog, you know I'm a fan of sweets. As in, I love sugar. Part of this new diet/lifestyle change is really reducing your sugar intake, and he really wants us to stay away from artificial sweeteners. Bob, I love all of your other suggestions...but this one has been toughest for me. Getting rid of soda/pop - fine, we don't drink it anyway (which impressed my dentist yesterday, btw. Lighten up on the pop for smaller waistlines AND better teeth. Go figure). Have an apple a day? Okay, I heart apples so I can do that. But sugar...? Bobbbbbb...*whine*

I know I have to cut it out though if I want to lose anything, so I did. For the most part. We bought Greek yogurt plain, and I have to put a little Splenda in it. It's just too bitter otherwise for me, as in FULL BODY REJECTION to the taste and texture. Blergh. Makes me shiver just thinking about it. 

So when I ran across this pin (actually, I think I pinned it from my sister-in-law. Thanks girl! :) I wanted to give it a try because I really do want to like Greek yogurt. I want to give it a chance and man, did I want some chocolate.

Rich Chocolate Protein FroYo from Muffin-Topless (haha, love that name)
I am happy to report - it wasn't bad. At all. In fact, it was pretty dang good. Of course, I made a few modifications... but they're along the same line and idea as Muffin-Topless.

Want to make some? Here's what you'll need.

• 6 oz. (a little less than a cup... I used about half of the container and it was plenty for Mr. LOC and I to share) of Greek Yogurt, plain.
• 2 Tablespoons of baking cocoa
• 3 packets of Splenda (I didn't have Stevia... and even though I'm only showing 2 packets, it needed 3)
• A dash of vanilla extract

I added the vanilla extract to the recipe, as it was still lacking after mixing up the other ingredients. If you use the vanilla flavored Greek Yogurt, you can omit this step.


Add your Greek yogurt to a bowl. I recommend using glass like Corelle so you don't get that plastic-y taste after you freeze it later. Nothing worse than plastic-y tasting sort-of ice cream (plus, that plastic taste is not good for you!)


Add the 2 tablespoons of baking cocoa, the three packets of Splenda, and the dash of vanilla. Mix thoroughly.

Take out the spoon, cling-wrap it and toss it in the freezer. It's an easy low calorie "dessert" at night!

Hope you enjoy! Let me know how this turned out for you! Spring is just around the corner (thank God). Next week I've got a salad recipe you won't want to miss and another offer for the Etsy store just for my loyal readers! See you then!
I'm linking up to these parties!

Labels

Flickr Images

Like us on Facebook

Popular Posts


Little Oak Creations Template by Ipietoon Cute Blog Design

Blogger Templates