Showing posts with label 5 ingredients. Show all posts

Thursday, July 4, 2013

Happy 4th of July and Rhubarb Pie

Hi all and Happy 4th of July! Where has this summer gone?

Around the middle/end of June, I spied that my rhubarb plant had taken off and had given me a bunch of nice, new stems. Both of our rhubarb plants caught some sort of blight-like disease last year and we ended up not having rhubarb very long. So when I saw that the plant (only one came back :( ) had given me enough for a pie... I ran out there with kitchen scissors like a mad man (not really, running with scissors is not recommended. But I did get out there pretty darn quick.)

Now I haven't always been a fan a rhubarb, although like many children, I never gave it a chance either. In our first summer of living here, I gave it a shot and I was hooked. This is the recipe I never waver from because it is that good.

Rhubarb really can shine alone without the help of strawberries or other fruits. When you pack it with enough sugar, it evens out the extreme tart of rhubarb and creates a sweet and slightly tart pie that is really good warm, but even better cold in my opinion... which makes it the perfect pie for picnics.

Ready to make your own? You'll need:
• 4 cups of chopped rhubarb. (This is where I waver only a little... I think I had only about 2 3/4 cups of rhubarb when I was all said and done. This makes for a still tasty pie but 4 cups would definitely make for a thicker pie.) This requires a LOT of stems to get to 4 cups - pictured below is roughly 2 3/4 cup.
• 1 1/3 cups white sugar
• 6 tablespoons all purpose flour
• 1 tablespoon butter (real salted butter, not margarine)
• A 2 pack of premade pie crusts, you'll use both.

You'll also need:
• a pie plate
• a large measuring cup (up to four cup)
• cutting board/knife
• mixing bowl

First, preheat your oven to 450 degrees. Chop the leafs off and the wide bottoms off as well. Make sure to discard the leaves properly, especially if you have pets and small children as they can be quite poisonous if ingested... but the stems are good to go.


Rinse them off, pat them dry. Chop the rhubarb into small slices - the smaller the better, as they'll cook down the best this way.


In a mixing bowl, combine the sugar and flour. In in your pie plate, unroll a pie crust and set in the bottom of the pie plate. The pie plate doesn't require greasing before you put your crust in.


Sprinkle about a 1/4 of your flour and sugar mix on top of the crust. This doesn't have to be exactly 1/4 of your mixture, just eyeball it. Heap the rhubarb on top of the mixture in the pie plate, and then sprinkle the remaining sugar and flour on top of the rhubarb.

Take your tablespoon of butter and chop it into little pieces. Dot the butter randomly on top of the mixture. It should look something like this:


Cover with the remaining crust and pinch the sides together. Make some fancy slices in the top to be...well, fancy. (This actually helps some steam escape, but it looks nice too.)

Place your pie in the oven and bake at 450 for 15 minutes. After 15 minutes has completed, reduce the temperature to 350 and continue baking for 40 to 45 minutes. Do keep an eye on your crust... sometimes I have to place some tinfoil around the edges if they start to brown too much. Serve warm or cold, with vanilla ice cream is the best! :)


Thanks for following along! Have you ever had rhubarb pie? Have you had it before but with strawberries in it? Share your stories in the comments and share this recipe with your friends -- or don't and blow everyone's minds with this amazing recipe at your next picnic! Have a safe and happy 4th of July!


Tuesday, May 7, 2013

BBQ Bacon Turkey Calzone Recipe

Bacon makes everything better, doesn't it? :)

That's what I thought when I was trying to figure out what the make with a half package of bacon and about 3/4 of a pound of ground turkey a few nights ago. I combined those with some BBQ sauce, some cheese and a pizza crust.... and came up with the "BBQ Bacon Turkey Calzone" - and it was so good Mr. LOC requested it again ASAP! :) This post was my second time making it and I think it was even better than the first!

This makes a great splurge meal! ;) It's got all the makings of a classic comfort food. If you've got a BBQ lover in your life, you've got to try this out.


Ready to make your own? You'll need:
• Sweet Baby Ray's Honey Chipotle BBQ sauce - we think that this is a big part of why this tastes so good, so I highly recommend grabbing some of this.
• 10-12 oz of ground turkey (about half the amount of turkey in the package above)
• Half of a package of bacon
• About 1/2 - 3/4 cup of shredded cheddar cheese
• a packet of easy prep pizza crust
• A dash of onion powder
• A dash of garlic powder
• Salt and pepper

You'll also want:
• A cookie sheet
• Some flour
• Some Pam-type spray
• A rolling pin
• Kitchen shears
• Large saucepan
• A cutting board
• A colander

Start by preheating your oven to 450. Follow the directions according to the packet of pizza crust and prepare your pizza crust to the point of letting it rise in the bowl, and let it rise while you work on the next steps of the calzone. You could also use a pre-made dough ball crust too.

Next, start browning your ground turkey in a large saucepan. Add a dash of salt, pepper, and onion powder. Once it's browned, put it in a colander, bowl underneath to catch the grease. Set it aside for now.

In that same saucepan, cook your bacon. Cook it until it's just cooked - you don't want it ultra crispy (which is tough for me, as that's the way I like it...ultra crisp! :).

Move the bacon once cooked to another plate. Using some kitchen shears, cut the bacon into pieces. Set aside.

Add your BBQ sauce to the meat. Add just enough so that it will cover the meat completely once stirred. I probably added about 1/4-1/3 cup of BBQ sauce. Stir so that the meat is coated. I do this right in the colander.


Now, add some flour to the pizza dough (not a lot, just so it's not so sticky) and kneed the dough. Take a rolling pin and roll the dough out to fit your cookie sheet, I usually do this on a separate cutting board. Spray your cookie sheet with Pam spray and move your stretched out crust carefully and quickly to your cookie sheet (having them right next to each other is recommended.)


Now, add your toppings. I add my ground turkey first, bacon, cheese and then a layer of BBQ sauce.


Now, start at the bottom of the pan, closest towards you and begin rolling. You have to be quick and do this pretty carefully, otherwise it will get explode-y or not want to roll correctly. Roll up the pan until the roll is at the top of the pan, then scoot it (carefully so you don't tear it apart!) back to the middle of the pan.

Then, take your garlic powder and dash a little down the calzone on top. This cooks up really nicely and gives it a great flavor.


Your oven should be preheated at this point, so go ahead and put it in the oven. Bake for 12-15 minutes in the oven, your top will get golden brown.


Take it out and let it cool for a second (the sugar in the BBQ really stays hot for a bit! whew!) and then enjoy!


Thank you for following along! I hope you enjoy my BBQ bacon turkey calzone recipe. Let me know how this turned out for you! :)

Friday, April 5, 2013

It's Pinspired Friday! {Green Tea Mango Smoothies}

Good morning all!

I am happy to report that a) I am down 2 pants/skirts sizes as of yesterday. I had a sudden BURST of energy yesterday and switched out all of the winter clothes with my spring clothes... and I also decided to try on everything that did not fit last summer, or I've been holding on to in the hopes of fitting into again someday. I tried on a skirt that I bought in college that hasn't fit me for a long time, and sure enough... it fit. I was and am pretty dang excited. All of my shorts and capris that didn't fit last summer, now fit too. It was a really, really good feeling. I'm also happy to report that b) It's opening day for the Detroit Tigers (go Tigers!) and c) It's Pinspired Friday!


It all started when I ran across this pin:

From WhoSay.com - http://www.whosay.com/joybauer/photos/233971
The pin was for a green tea mango smoothie, with a promise of yummy and energy, both of which I enjoy. I had all the ingredients on hand, so I decided to give it a try. And you should too!


You'll need:
• 1 Green tea teabag, to be steeped in 6 oz. of water
• 1/2 cup of nonfat/fat free vanilla yogurt
• 1 cup of frozen mango chunks, unsweetened
• Not pictured - 7 ice cubes
• Not pictured - 1 packet of splenda

You'll also want:
• a blender
• a Pyrex or similar measuring cup to get the water boiling/hot

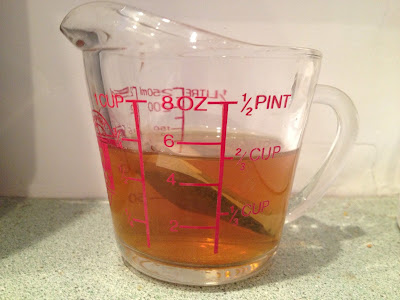
First, measure out 6 oz. of water in your measuring cup, and microwave it for about 3 minutes or until hot/near boiling. Stick your green tea bag in there after the water is ready.


We want the water to become quite saturated with the green tea, so let it sit for about 5 minutes.


As the tea is steeping, measure out your one cup of frozen mango:


Add the mango the blender, add your 1/2 cup of nonfat vanilla yogurt, add the green tea, add the packet of splenda and the ice cubes.

Add your blender top before blending, obviously... haha
Blend until all chunks are broken down and the mixture is smooth.


And enjoy! This recipe makes one glass full (these glasses are full size, I believe in the 14-16 oz range). The color is gorgeous, almost like an orange juice color but more yellow, and the taste is great! I was unsure if I was going to care for it as I usually don't care for green tea (I prefer black tea or even better, white tea) but the combination of the exotic taste of mango and the green tea work together really well. The original pin I got this front said the glass had 190 calories... not bad for breakfast! :) Thanks for following along!

I'm linking up to these parties!
Thrifty Decor Chick

Tuesday, March 5, 2013

Parmesan Pepper Roasted Cauliflower

As promised... we're going to chat about Parmesan Pepper Roasted Cauliflower today.  Diets/lifestyle changes are still going strong (woo!), I am down about 5.4 lbs and Mr. LOC is down about 8lbs so we're happy as we've not even been at this for a week yet.

This is a recipe from Bob Harper's "The Skinny Rules" that I modified very slightly. If you're wondering about that fish in that picture... check out my post on roasted chili lime tilapia.


So let's gather our ingredients:
• 1/2 head fresh cauliflower or 1/2 bag of frozen cauliflower florets
• Olive Oil
• Salt and pepper, freshly ground is my preference.
• Parmesan cheese
• Red pepper flakes

You'll also want:
• A toaster oven or regular oven. I used toaster as my tilapia was cooking at the same time in the other oven. :)
• A pot to boil water in

First, preheat your oven to 425. Then, start boiling water in pot - you need enough water to cover your cauliflower, plus a little more.

If you are using fresh like me, cut up your cauliflower into florets, meaning the heads and the little stems. If your water is boiling, go ahead and drop the florets into the boiling water. Boil them for about 5 minutes, or until they are cooked al dente.

Once the time has passed, drain and move the florets to a baking pan. Drizzle a little olive oil or spray a little olive oil onto the florets, dash a little salt, pepper, Parmesan, and red pepper flakes. The oil olive will help the spices stay on. Remember, we're trying to eat healthy, so don't coat the cauliflower with olive oil... it will make them mushy and not cook right if you put too much.


Your oven should be ready to go, so go ahead and place the pan in the oven and let the cauliflower roast for about 15 minutes. You're watching for the tops to brown slightly.


Those nice crispy parts are in part to the fact that we didn't spray down our pan with cooking spray before hand... you actually want those slightly brown (not burnt!) parts, as they have a great flavor!

Enjoy! We're having them again tonight and I can hardly wait! :)

Tuesday, January 29, 2013

Ground Beef Pie

Whenever we have ground beef, I like to jazz it up a little, instead of just cheeseburgers or hamburger helper (don't get me wrong, I love myself some burgers and hamburger helper! Stroganoff hamburger helper anyone? Yummm) but sometimes I just want to try other things with ground beef. I have had this recipe in my dancing teddy bear recipe book for a while now, and have surprisingly never made it.

Just by first glance at the recipe, I knew it was going to need some... jazz. haha. Ground beef is generally sort of flavorless, so are eggs, and so is biscuit mix. Cheese was pretty much the only flavor redeemer here. So I added a few spices and I could have probably added even more.

Let's gather our ingredients:
• 1 lb ground beef
• 1/2 tsp salt
• 1/4 tsp black pepper
• 1/2 tsp oregano
• 1/2 tsp garlic powder
• 1 cup of shredded cheddar cheese (I used sharp cheddar)
• 2 eggs, beaten
• 1 1/2 cups milk
• 3/4 cup biscuit/baking mix
• (Optional) Frank's Red Hot sauce. We put it on before we ate the pie and it gave it a nice kick in the pants. :)

You'll also want:
• A glass pie plate
• A colander for draining the grease off the beef.
• Measuring utensils are a plus too. ;)
• Some Pam spray. I made it without, and let's just say that the pie plate is soaking now... :(

You might want:
• Some onions or onion powder
• Some chili powder cooked in with the beef

I say this as I could have probably added even more spice to the pie to kick the flavor up even more. Maybe a chili or taco packet added to the ground beef would be good.


First, brown your ground beef. Drain the fat. Spray your pie plate and press your ground beef into the bottom of the glass pie plate. Sprinkle the salt, pepper and oregano over the beef. I didn't mix the spices in, but rather did them as a layer. While you're at it, preheat your oven to 400.


Then, sprinkle your cheese over the beef.


In a separate bowl, mix your eggs, milk and biscuit/baking mix.


Try to get as much baking mix to mix in. I had a little ways to go when I took this picture.

Now, pour that goodness over the cheese/meat.

At this point, you have a plate full of liquid, meat and cheese and you'll think you added too much milk (that's what I thought at least!). Don't worry, it actually cooks in pretty well... just be careful when putting in the oven, it'll want to slosh all over. Before you go putting it in the oven though, take your garlic powder and sprinkle over the top, not mixing it in. This gives this crust a super yummy garlic bread type flavor when it's done. Your oven should be to 400 at this point, so go ahead and put it in for 35 minutes.


After 35 yummy smelling minutes... we've got a ground beef pie on our hands. Do let it cool a bit before gnawing into it - it'll help it set and you'll get better shaped pieces when you go to serve it.

It was pretty good, especially with a little Frank's Red Hot on top of it, and it tasted even better as it cooled. I think I'll be giving this recipe another go, but with sage pork sausage crumbled in the bottom, and maybe a sausage gravy on top! (That'll make it healthy, I'm sure.) ;)

Thanks for following along!

Ground Beef PieOriginal Recipe from Taste of Home

Ingredients

• 1 lb ground beef
• 1/2 tsp salt
• 1/4 tsp black pepper
• 1/2 tsp oregano
• 1/2 tsp garlic powder
• 1 cup of shredded cheddar cheese
• 2 eggs, beaten
• 1 1/2 cups milk
• 3/4 cup biscuit/baking mix
• (Optional) Frank's Red Hot sauce

Directions
1) In a skillet, cook beef over medium heat until no longer pink; drain. Press into an ungreased (or lightly greased, if you want an easier clean up) 9-in. pie plate. Sprinkle with salt, pepper, oregano and cheese.

2) In a separate bowl, combine the eggs, milk and biscuit mix just until combined. Pour over cheese.

3) Sprinkle garlic powder over the mixture.
4) Bake at 400° for 35 minutes.
Let cool before serving and enjoy! Add a few dashes of hot sauce to kick up the flavor.


Friday, November 23, 2012

It's Pinspired Friday! {Sausage Pepper Cups Recipe}

Good morning and Happy Friday! I hope you all had a wonderful Thanksgiving yesterday. Today is Black Friday so if you are venturing out today for some deals please stay safe but have a good time! :)

It's time for...

Today I found inspiration on my personal "Food" board. I pinned this pin "over a year ago" according to Pinterest and have always thought it looked good but never had all of my "ingredient stars" align and I didn't want to go out and purchase these ingredients unless I was going to a party and needed a great appetizer... so there it sat.

"Sausage Stars" from With a Grateful Prayer and a Thankful Heart
This is apparently a Hidden Valley Ranch recipe from a while ago. The original recipe calls for black olives (bleck), green peppers (meh... prefer red ones), wonton wrappers, sausage, ranch, and shredded cheese (those last four are a-okay in my book! ;)) Well, I had the wonton wrappers, sausage and ranch but I was running low on shredded cheese... but I did have about 4 oz. of Velveeta cheese left... hmm! And that's where Pinspiration stuck.


To start, let's gather our ingredients:
• Wonton wrappers (I used about 14-15)
• 1lb pork sausage
• 4 oz. Velveeta cheese
• 1 small red pepper. Mine was shaped like a small banana pepper. If you can't find that kind, use just a little bit of a red bell pepper.
• A pinch of shredded cheddar cheese
• 1-2 tablespoons Ranch Dressing

You'll also want:
• Some spray oil - I use spray canola oil.
• A muffin tin. I used a "normal" sized muffin tin, it would appear that the original pin used a mini size muffin pan. If you want them to stretch farther than a yield of 14, use a mini muffin tin (you'll need more than 14 wonton wrappers then) With the typical sized muffin pan, they'll make cups, but one side might be farther down than the others.
• A non-stick cookie sheet


First, preheat your oven to 350, and then get out your wonton wrappers. Mine had a slightly stiff side... but no worries. If you get your wrappers out and they have any stiff parts, do this:


Get a small microwave safe plate, and run it under water. You just want the plate almost damp, so shake off excess water, then throw your stack on the plate. You might end up with the wonton wrapper that is sitting directly on the plate being too soggy to use, so just throw that one out at the end. Put the stack of wrappers on the plate into the microwave, and microwave for 10-15 seconds. They should come out much more pliable.

Now take your canola spray and spray the muffin tin cups. Place a wonton wrapper in each, and then hit them with a spray of the oil too. This'll help them crisp up.


 Your oven should be preheated to 350, so go ahead and place your wrappers in the oven. Mine took about 7 minutes to get a nice crisp edge. The original recipe calls for 5 minutes, but mine were not there yet at the 5 minute mark. The bottom of the wonton may not be super crispy at this point - that's okay, we're just looking for the edges to be slightly crispy so they'll stand up right now. Leave your oven on, we'll need it again.

Set those aside, and begin browning your sausage. While the sausage is browning, cut up your 4 oz. of Velveeta into smaller, more-easy-to-melt chunks.
Cut up your small red banana pepper. I cut it up right on the same plate as the cheese. Once your meat is pretty much all browned, put the cheese and pepper in. Mix it up to help the cheese melt. Add 1-2 tablespoons of Ranch dressing to the pot.

Yummmm! Mix it all up until the cheese is sufficiently melted. Now, get your cookie sheet out and transfer the cups from the muffin tin to the cookie pan. If you're like me, you're like... why get another pan dirty? Well, when they're not in the cups, the air will circulate better and help the bottom crisp up, and they won't become soggy cups. Otherwise I wouldn't be getting another pan dirty! :)

Take your mix and spoon the mix into the cups. Add just a hint of shredded cheese to the tops.

Bake at 350 for another 5 minutes. Yields about 14-15 cups if using a typical size muffin pan, would yield more in a mini muffin pan. Enjoy!! Makes a great appetizer for a party or a ridiculously yummy dinner too! ;)


Sausage Pepper Cups

Ingredients 
• Wonton wrappers
• 1lb pork sausage
• 4 oz. Velveeta cheese
• 1 small red pepper. Mine was shaped like a small banana pepper. If you can't find that kind, use just a little bit of a red bell pepper.
• A pinch of shredded cheddar cheese
• 1-2 tablespoons Ranch Dressing

1) Preheat oven to 350.
2) Spray your muffin pan with oil spray (I used canola), make sure the cups are sprayed well. Add wonton wrappers to each hole. A regular sized muffin tin and this recipe will yield about 14-15 cups.
3) Lightly spray each wonton wrapper with the oil spray.
4) Bake wonton wrappers for 5-7 minutes until sides are crispy.
5) Brown sausage. As sausage is browning, slice 4 oz. Velveeta cheese into smaller chunks. Chop small red pepper.
6) As sausage nears completion, add cheese, red pepper, and 1-2 tablespoons of Ranch dressing.
7) Remove crispy wonton cups and place on a non-stick cookie sheet.
8) Once cheese is melted, spoon mixture into wonton cups.
9) Sprinkle a little shredded cheddar cheese on top of each cup, and place in the oven. Bake for 5 minutes at 350 degrees. Remove and enjoy!

Thanks for following along!
Showing posts with label 5 ingredients. Show all posts

Thursday, July 4, 2013

Happy 4th of July and Rhubarb Pie

Hi all and Happy 4th of July! Where has this summer gone?

Around the middle/end of June, I spied that my rhubarb plant had taken off and had given me a bunch of nice, new stems. Both of our rhubarb plants caught some sort of blight-like disease last year and we ended up not having rhubarb very long. So when I saw that the plant (only one came back :( ) had given me enough for a pie... I ran out there with kitchen scissors like a mad man (not really, running with scissors is not recommended. But I did get out there pretty darn quick.)

Now I haven't always been a fan a rhubarb, although like many children, I never gave it a chance either. In our first summer of living here, I gave it a shot and I was hooked. This is the recipe I never waver from because it is that good.

Rhubarb really can shine alone without the help of strawberries or other fruits. When you pack it with enough sugar, it evens out the extreme tart of rhubarb and creates a sweet and slightly tart pie that is really good warm, but even better cold in my opinion... which makes it the perfect pie for picnics.

Ready to make your own? You'll need:
• 4 cups of chopped rhubarb. (This is where I waver only a little... I think I had only about 2 3/4 cups of rhubarb when I was all said and done. This makes for a still tasty pie but 4 cups would definitely make for a thicker pie.) This requires a LOT of stems to get to 4 cups - pictured below is roughly 2 3/4 cup.
• 1 1/3 cups white sugar
• 6 tablespoons all purpose flour
• 1 tablespoon butter (real salted butter, not margarine)
• A 2 pack of premade pie crusts, you'll use both.

You'll also need:
• a pie plate
• a large measuring cup (up to four cup)
• cutting board/knife
• mixing bowl

First, preheat your oven to 450 degrees. Chop the leafs off and the wide bottoms off as well. Make sure to discard the leaves properly, especially if you have pets and small children as they can be quite poisonous if ingested... but the stems are good to go.


Rinse them off, pat them dry. Chop the rhubarb into small slices - the smaller the better, as they'll cook down the best this way.


In a mixing bowl, combine the sugar and flour. In in your pie plate, unroll a pie crust and set in the bottom of the pie plate. The pie plate doesn't require greasing before you put your crust in.


Sprinkle about a 1/4 of your flour and sugar mix on top of the crust. This doesn't have to be exactly 1/4 of your mixture, just eyeball it. Heap the rhubarb on top of the mixture in the pie plate, and then sprinkle the remaining sugar and flour on top of the rhubarb.

Take your tablespoon of butter and chop it into little pieces. Dot the butter randomly on top of the mixture. It should look something like this:


Cover with the remaining crust and pinch the sides together. Make some fancy slices in the top to be...well, fancy. (This actually helps some steam escape, but it looks nice too.)

Place your pie in the oven and bake at 450 for 15 minutes. After 15 minutes has completed, reduce the temperature to 350 and continue baking for 40 to 45 minutes. Do keep an eye on your crust... sometimes I have to place some tinfoil around the edges if they start to brown too much. Serve warm or cold, with vanilla ice cream is the best! :)


Thanks for following along! Have you ever had rhubarb pie? Have you had it before but with strawberries in it? Share your stories in the comments and share this recipe with your friends -- or don't and blow everyone's minds with this amazing recipe at your next picnic! Have a safe and happy 4th of July!


Tuesday, May 7, 2013

BBQ Bacon Turkey Calzone Recipe

Bacon makes everything better, doesn't it? :)

That's what I thought when I was trying to figure out what the make with a half package of bacon and about 3/4 of a pound of ground turkey a few nights ago. I combined those with some BBQ sauce, some cheese and a pizza crust.... and came up with the "BBQ Bacon Turkey Calzone" - and it was so good Mr. LOC requested it again ASAP! :) This post was my second time making it and I think it was even better than the first!

This makes a great splurge meal! ;) It's got all the makings of a classic comfort food. If you've got a BBQ lover in your life, you've got to try this out.


Ready to make your own? You'll need:
• Sweet Baby Ray's Honey Chipotle BBQ sauce - we think that this is a big part of why this tastes so good, so I highly recommend grabbing some of this.
• 10-12 oz of ground turkey (about half the amount of turkey in the package above)
• Half of a package of bacon
• About 1/2 - 3/4 cup of shredded cheddar cheese
• a packet of easy prep pizza crust
• A dash of onion powder
• A dash of garlic powder
• Salt and pepper

You'll also want:
• A cookie sheet
• Some flour
• Some Pam-type spray
• A rolling pin
• Kitchen shears
• Large saucepan
• A cutting board
• A colander

Start by preheating your oven to 450. Follow the directions according to the packet of pizza crust and prepare your pizza crust to the point of letting it rise in the bowl, and let it rise while you work on the next steps of the calzone. You could also use a pre-made dough ball crust too.

Next, start browning your ground turkey in a large saucepan. Add a dash of salt, pepper, and onion powder. Once it's browned, put it in a colander, bowl underneath to catch the grease. Set it aside for now.

In that same saucepan, cook your bacon. Cook it until it's just cooked - you don't want it ultra crispy (which is tough for me, as that's the way I like it...ultra crisp! :).

Move the bacon once cooked to another plate. Using some kitchen shears, cut the bacon into pieces. Set aside.

Add your BBQ sauce to the meat. Add just enough so that it will cover the meat completely once stirred. I probably added about 1/4-1/3 cup of BBQ sauce. Stir so that the meat is coated. I do this right in the colander.


Now, add some flour to the pizza dough (not a lot, just so it's not so sticky) and kneed the dough. Take a rolling pin and roll the dough out to fit your cookie sheet, I usually do this on a separate cutting board. Spray your cookie sheet with Pam spray and move your stretched out crust carefully and quickly to your cookie sheet (having them right next to each other is recommended.)


Now, add your toppings. I add my ground turkey first, bacon, cheese and then a layer of BBQ sauce.


Now, start at the bottom of the pan, closest towards you and begin rolling. You have to be quick and do this pretty carefully, otherwise it will get explode-y or not want to roll correctly. Roll up the pan until the roll is at the top of the pan, then scoot it (carefully so you don't tear it apart!) back to the middle of the pan.

Then, take your garlic powder and dash a little down the calzone on top. This cooks up really nicely and gives it a great flavor.


Your oven should be preheated at this point, so go ahead and put it in the oven. Bake for 12-15 minutes in the oven, your top will get golden brown.


Take it out and let it cool for a second (the sugar in the BBQ really stays hot for a bit! whew!) and then enjoy!


Thank you for following along! I hope you enjoy my BBQ bacon turkey calzone recipe. Let me know how this turned out for you! :)

Friday, April 5, 2013

It's Pinspired Friday! {Green Tea Mango Smoothies}

Good morning all!

I am happy to report that a) I am down 2 pants/skirts sizes as of yesterday. I had a sudden BURST of energy yesterday and switched out all of the winter clothes with my spring clothes... and I also decided to try on everything that did not fit last summer, or I've been holding on to in the hopes of fitting into again someday. I tried on a skirt that I bought in college that hasn't fit me for a long time, and sure enough... it fit. I was and am pretty dang excited. All of my shorts and capris that didn't fit last summer, now fit too. It was a really, really good feeling. I'm also happy to report that b) It's opening day for the Detroit Tigers (go Tigers!) and c) It's Pinspired Friday!


It all started when I ran across this pin:

From WhoSay.com - http://www.whosay.com/joybauer/photos/233971
The pin was for a green tea mango smoothie, with a promise of yummy and energy, both of which I enjoy. I had all the ingredients on hand, so I decided to give it a try. And you should too!


You'll need:
• 1 Green tea teabag, to be steeped in 6 oz. of water
• 1/2 cup of nonfat/fat free vanilla yogurt
• 1 cup of frozen mango chunks, unsweetened
• Not pictured - 7 ice cubes
• Not pictured - 1 packet of splenda

You'll also want:
• a blender
• a Pyrex or similar measuring cup to get the water boiling/hot

First, measure out 6 oz. of water in your measuring cup, and microwave it for about 3 minutes or until hot/near boiling. Stick your green tea bag in there after the water is ready.


We want the water to become quite saturated with the green tea, so let it sit for about 5 minutes.


As the tea is steeping, measure out your one cup of frozen mango:


Add the mango the blender, add your 1/2 cup of nonfat vanilla yogurt, add the green tea, add the packet of splenda and the ice cubes.

Add your blender top before blending, obviously... haha
Blend until all chunks are broken down and the mixture is smooth.


And enjoy! This recipe makes one glass full (these glasses are full size, I believe in the 14-16 oz range). The color is gorgeous, almost like an orange juice color but more yellow, and the taste is great! I was unsure if I was going to care for it as I usually don't care for green tea (I prefer black tea or even better, white tea) but the combination of the exotic taste of mango and the green tea work together really well. The original pin I got this front said the glass had 190 calories... not bad for breakfast! :) Thanks for following along!

I'm linking up to these parties!
Thrifty Decor Chick

Tuesday, March 5, 2013

Parmesan Pepper Roasted Cauliflower

As promised... we're going to chat about Parmesan Pepper Roasted Cauliflower today.  Diets/lifestyle changes are still going strong (woo!), I am down about 5.4 lbs and Mr. LOC is down about 8lbs so we're happy as we've not even been at this for a week yet.

This is a recipe from Bob Harper's "The Skinny Rules" that I modified very slightly. If you're wondering about that fish in that picture... check out my post on roasted chili lime tilapia.


So let's gather our ingredients:
• 1/2 head fresh cauliflower or 1/2 bag of frozen cauliflower florets
• Olive Oil
• Salt and pepper, freshly ground is my preference.
• Parmesan cheese
• Red pepper flakes

You'll also want:
• A toaster oven or regular oven. I used toaster as my tilapia was cooking at the same time in the other oven. :)
• A pot to boil water in

First, preheat your oven to 425. Then, start boiling water in pot - you need enough water to cover your cauliflower, plus a little more.

If you are using fresh like me, cut up your cauliflower into florets, meaning the heads and the little stems. If your water is boiling, go ahead and drop the florets into the boiling water. Boil them for about 5 minutes, or until they are cooked al dente.

Once the time has passed, drain and move the florets to a baking pan. Drizzle a little olive oil or spray a little olive oil onto the florets, dash a little salt, pepper, Parmesan, and red pepper flakes. The oil olive will help the spices stay on. Remember, we're trying to eat healthy, so don't coat the cauliflower with olive oil... it will make them mushy and not cook right if you put too much.


Your oven should be ready to go, so go ahead and place the pan in the oven and let the cauliflower roast for about 15 minutes. You're watching for the tops to brown slightly.


Those nice crispy parts are in part to the fact that we didn't spray down our pan with cooking spray before hand... you actually want those slightly brown (not burnt!) parts, as they have a great flavor!

Enjoy! We're having them again tonight and I can hardly wait! :)

Tuesday, January 29, 2013

Ground Beef Pie

Whenever we have ground beef, I like to jazz it up a little, instead of just cheeseburgers or hamburger helper (don't get me wrong, I love myself some burgers and hamburger helper! Stroganoff hamburger helper anyone? Yummm) but sometimes I just want to try other things with ground beef. I have had this recipe in my dancing teddy bear recipe book for a while now, and have surprisingly never made it.

Just by first glance at the recipe, I knew it was going to need some... jazz. haha. Ground beef is generally sort of flavorless, so are eggs, and so is biscuit mix. Cheese was pretty much the only flavor redeemer here. So I added a few spices and I could have probably added even more.

Let's gather our ingredients:
• 1 lb ground beef
• 1/2 tsp salt
• 1/4 tsp black pepper
• 1/2 tsp oregano
• 1/2 tsp garlic powder
• 1 cup of shredded cheddar cheese (I used sharp cheddar)
• 2 eggs, beaten
• 1 1/2 cups milk
• 3/4 cup biscuit/baking mix
• (Optional) Frank's Red Hot sauce. We put it on before we ate the pie and it gave it a nice kick in the pants. :)

You'll also want:
• A glass pie plate
• A colander for draining the grease off the beef.
• Measuring utensils are a plus too. ;)
• Some Pam spray. I made it without, and let's just say that the pie plate is soaking now... :(

You might want:
• Some onions or onion powder
• Some chili powder cooked in with the beef

I say this as I could have probably added even more spice to the pie to kick the flavor up even more. Maybe a chili or taco packet added to the ground beef would be good.


First, brown your ground beef. Drain the fat. Spray your pie plate and press your ground beef into the bottom of the glass pie plate. Sprinkle the salt, pepper and oregano over the beef. I didn't mix the spices in, but rather did them as a layer. While you're at it, preheat your oven to 400.


Then, sprinkle your cheese over the beef.


In a separate bowl, mix your eggs, milk and biscuit/baking mix.


Try to get as much baking mix to mix in. I had a little ways to go when I took this picture.

Now, pour that goodness over the cheese/meat.

At this point, you have a plate full of liquid, meat and cheese and you'll think you added too much milk (that's what I thought at least!). Don't worry, it actually cooks in pretty well... just be careful when putting in the oven, it'll want to slosh all over. Before you go putting it in the oven though, take your garlic powder and sprinkle over the top, not mixing it in. This gives this crust a super yummy garlic bread type flavor when it's done. Your oven should be to 400 at this point, so go ahead and put it in for 35 minutes.


After 35 yummy smelling minutes... we've got a ground beef pie on our hands. Do let it cool a bit before gnawing into it - it'll help it set and you'll get better shaped pieces when you go to serve it.

It was pretty good, especially with a little Frank's Red Hot on top of it, and it tasted even better as it cooled. I think I'll be giving this recipe another go, but with sage pork sausage crumbled in the bottom, and maybe a sausage gravy on top! (That'll make it healthy, I'm sure.) ;)

Thanks for following along!

Ground Beef PieOriginal Recipe from Taste of Home

Ingredients

• 1 lb ground beef
• 1/2 tsp salt
• 1/4 tsp black pepper
• 1/2 tsp oregano
• 1/2 tsp garlic powder
• 1 cup of shredded cheddar cheese
• 2 eggs, beaten
• 1 1/2 cups milk
• 3/4 cup biscuit/baking mix
• (Optional) Frank's Red Hot sauce

Directions
1) In a skillet, cook beef over medium heat until no longer pink; drain. Press into an ungreased (or lightly greased, if you want an easier clean up) 9-in. pie plate. Sprinkle with salt, pepper, oregano and cheese.

2) In a separate bowl, combine the eggs, milk and biscuit mix just until combined. Pour over cheese.

3) Sprinkle garlic powder over the mixture.
4) Bake at 400° for 35 minutes.
Let cool before serving and enjoy! Add a few dashes of hot sauce to kick up the flavor.


Friday, November 23, 2012

It's Pinspired Friday! {Sausage Pepper Cups Recipe}

Good morning and Happy Friday! I hope you all had a wonderful Thanksgiving yesterday. Today is Black Friday so if you are venturing out today for some deals please stay safe but have a good time! :)

It's time for...

Today I found inspiration on my personal "Food" board. I pinned this pin "over a year ago" according to Pinterest and have always thought it looked good but never had all of my "ingredient stars" align and I didn't want to go out and purchase these ingredients unless I was going to a party and needed a great appetizer... so there it sat.

"Sausage Stars" from With a Grateful Prayer and a Thankful Heart
This is apparently a Hidden Valley Ranch recipe from a while ago. The original recipe calls for black olives (bleck), green peppers (meh... prefer red ones), wonton wrappers, sausage, ranch, and shredded cheese (those last four are a-okay in my book! ;)) Well, I had the wonton wrappers, sausage and ranch but I was running low on shredded cheese... but I did have about 4 oz. of Velveeta cheese left... hmm! And that's where Pinspiration stuck.


To start, let's gather our ingredients:
• Wonton wrappers (I used about 14-15)
• 1lb pork sausage
• 4 oz. Velveeta cheese
• 1 small red pepper. Mine was shaped like a small banana pepper. If you can't find that kind, use just a little bit of a red bell pepper.
• A pinch of shredded cheddar cheese
• 1-2 tablespoons Ranch Dressing

You'll also want:
• Some spray oil - I use spray canola oil.
• A muffin tin. I used a "normal" sized muffin tin, it would appear that the original pin used a mini size muffin pan. If you want them to stretch farther than a yield of 14, use a mini muffin tin (you'll need more than 14 wonton wrappers then) With the typical sized muffin pan, they'll make cups, but one side might be farther down than the others.
• A non-stick cookie sheet


First, preheat your oven to 350, and then get out your wonton wrappers. Mine had a slightly stiff side... but no worries. If you get your wrappers out and they have any stiff parts, do this:


Get a small microwave safe plate, and run it under water. You just want the plate almost damp, so shake off excess water, then throw your stack on the plate. You might end up with the wonton wrapper that is sitting directly on the plate being too soggy to use, so just throw that one out at the end. Put the stack of wrappers on the plate into the microwave, and microwave for 10-15 seconds. They should come out much more pliable.

Now take your canola spray and spray the muffin tin cups. Place a wonton wrapper in each, and then hit them with a spray of the oil too. This'll help them crisp up.


 Your oven should be preheated to 350, so go ahead and place your wrappers in the oven. Mine took about 7 minutes to get a nice crisp edge. The original recipe calls for 5 minutes, but mine were not there yet at the 5 minute mark. The bottom of the wonton may not be super crispy at this point - that's okay, we're just looking for the edges to be slightly crispy so they'll stand up right now. Leave your oven on, we'll need it again.

Set those aside, and begin browning your sausage. While the sausage is browning, cut up your 4 oz. of Velveeta into smaller, more-easy-to-melt chunks.
Cut up your small red banana pepper. I cut it up right on the same plate as the cheese. Once your meat is pretty much all browned, put the cheese and pepper in. Mix it up to help the cheese melt. Add 1-2 tablespoons of Ranch dressing to the pot.

Yummmm! Mix it all up until the cheese is sufficiently melted. Now, get your cookie sheet out and transfer the cups from the muffin tin to the cookie pan. If you're like me, you're like... why get another pan dirty? Well, when they're not in the cups, the air will circulate better and help the bottom crisp up, and they won't become soggy cups. Otherwise I wouldn't be getting another pan dirty! :)

Take your mix and spoon the mix into the cups. Add just a hint of shredded cheese to the tops.

Bake at 350 for another 5 minutes. Yields about 14-15 cups if using a typical size muffin pan, would yield more in a mini muffin pan. Enjoy!! Makes a great appetizer for a party or a ridiculously yummy dinner too! ;)


Sausage Pepper Cups

Ingredients 
• Wonton wrappers
• 1lb pork sausage
• 4 oz. Velveeta cheese
• 1 small red pepper. Mine was shaped like a small banana pepper. If you can't find that kind, use just a little bit of a red bell pepper.
• A pinch of shredded cheddar cheese
• 1-2 tablespoons Ranch Dressing

1) Preheat oven to 350.
2) Spray your muffin pan with oil spray (I used canola), make sure the cups are sprayed well. Add wonton wrappers to each hole. A regular sized muffin tin and this recipe will yield about 14-15 cups.
3) Lightly spray each wonton wrapper with the oil spray.
4) Bake wonton wrappers for 5-7 minutes until sides are crispy.
5) Brown sausage. As sausage is browning, slice 4 oz. Velveeta cheese into smaller chunks. Chop small red pepper.
6) As sausage nears completion, add cheese, red pepper, and 1-2 tablespoons of Ranch dressing.
7) Remove crispy wonton cups and place on a non-stick cookie sheet.
8) Once cheese is melted, spoon mixture into wonton cups.
9) Sprinkle a little shredded cheddar cheese on top of each cup, and place in the oven. Bake for 5 minutes at 350 degrees. Remove and enjoy!

Thanks for following along!

Labels

Flickr Images

Like us on Facebook

Popular Posts


Little Oak Creations Template by Ipietoon Cute Blog Design

Blogger Templates