Showing posts with label chocolate chips. Show all posts

Thursday, December 27, 2012

Chocolate Peanut Butter Maple Bacon Fudge


No, that second-to-last word in the title is not a misprint. 
BACON.
Yum.

I was looking for something to supplement my younger brother's gift, and goodies for my friend's treat baskets this Christmas. Something different. Something a little strange but in a strangely good way. It turns out that Chocolate Peanut Butter Maple Bacon Fudge (say THAT 10 times fast!) was just what I was looking for.

You should probably give this out as gifts next year or ladies! Make this for your hubby/significant other this Valentine's Day. It's easy and men love bacon and chocolate (but so do I... who am I kidding.)

Let's gather your ingredients. You'll need:
• A package of bacon. I believe my package was either 12 oz or 16 oz.
• 1 1/2 cups semi-sweet chocolate chips
• 1/2 cup peanut butter chocolate chips (spend the extra dollar and get the Reese's ones. You won't regret it. I didn't really have a choice as it's the only kind my store carried but you can't beat the taste of Reese's peanut butter!)
• 1 - 14 oz can of sweetened condensed milk
• 4 TBSP of unsalted butter (I used salted as it was all I had - didn't make much of a difference.)
• 1/2 tsp maple flavoring *

You'll also need:
• A pan of some sort with the most straight up and down sides you can find. I ended up using a 12x9 French White Corningware dish.
• Crisco or Pam Spray

* A note on the maple flavoring - I didn't have it nor was I going to purchase it for 1/2 tsp - I used just a little bit of normal syrup and it turned out just fine. I don't think 1/2 tsp. of anything will make that much difference in this recipe, you really could probably even leave it out.


Grease up your pan before you get started.

Using your preferred method, crisp up your bacon. (some like baking bacon, some microwave it, and some pan fry it... I pan fried it.) You'll want to crisp it up to not where it's black but not where it's rubbery still either.
Cooking the bacon... not ready yet


When it's browned up and crispy, transfer it to a plate. Carefully blot at the grease on the bacon with a paper towel - don't burn yourself. Grease burns are no fun. I don't set a towel underneath as I cut my bacon into small pieces right on that plate with kitchen scissors, and cutting up paper towel with your bacon isn't going to taste so good.


Chop the bacon into fine pieces with your kitchen scissors. The more fine, the better.

Now, in a different pan (I used a dutch oven for this part), melt your 4 TBSP of butter, your 1 1/2 cups of semi-sweet chips, your 1/2 cup of peanut butter chips, the 14 oz can of condensed milk, and your 1/2 teaspoon of syrup. Cook and stir until melted. Make sure to cook these ingredients over medium-low heat. It melts faster than you would think! Burnt chocolate is one of the saddest and worst smelling things.

Now, add most of your bacon - reserve a little on the side for garnish on top later.

Empty your dutch oven into your greased up pan. Try not to stir the grease (especially if you used pam spray) into the fudge mixture - to move it around to fill to the edges, take your spoon and lightly dab into the fudge to make it spread.

*drool*
Take the rest of the bacon you had reserved and spread it on top of the fudge. Hubba hubba.

Here's the best part - no baking! Let it cool for a few minutes, then cover it with aluminum foil and stick in the fridge. You'll want to give it at least 4 hours to set up, but overnight is better.

I was able to cut this into about 54 1x1 squares, so PLENTY to go around! And I may have had a piece or two while cutting it up. ;)


Thanks for following along! Let me know how this turned out for you! And try not to eat the whole pan! (I won't judge though if it happens. Ha! ;)

Chocolate Peanut Butter Maple Bacon Fudge
Adapted from Justapinch.com

Ingredients:
• A package of bacon. I believe my package was either 12 oz or 16 oz.
• 1 1/2 cups semi-sweet chocolate chips
• 1/2 cup peanut butter chocolate chips
• 1 - 14 oz can of sweetened condensed milk
• 4 TBSP butter (salted or unsalted)
• 1/2 tsp maple flavoring or syrup

 Directions:
1) Coat pan with Pam spray or Crisco. It can really be whatever size pan you want - just try to find the one with the straightest sides. I used a 12x9.
2) Cook your bacon until crispy. Move bacon to plate when complete, dab at grease with paper towel, chop into fine pieces.
3) To a different pan (not your bacon pan, I suggest a dutch oven), melt your remaining ingredients over medium-low heat.
4) When melted, remove from burner and add almost all bacon. Reserve a little for garnish.
5) Carefully scoop fudge into prepared greased pan. Jiggle to get the fudge to the edges or make indentations to get the fudge to move - just try not to mix the Pam spray or Crisco into the fudge.
6) Add remaining bacon pieces on top.
7) Cover with tinfoil, refrigerate for at least 4 hours, preferably overnight.


Tuesday, October 23, 2012

Chocolate Chip Blondies - For Budgets!

Well, there is a new favorite dessert in town... these chocolate chip blondies are seriously to die for. At night, we often crave a little sweet - and I'm often torn between making the yummy, taking the time, or sometimes I just don't have all of the ingredients. These blondie bars are almost like a cookie bar but have the density and the softness of a brownie. Have you ever had a cookie bar that you've almost busted a tooth on? That won't happen with these. These are soft but sturdy enough to hold in your hand.

The original recipe is from Taste of Home. I've adapted the original and made a few modifications. Don't you agree that Taste of Home has the BEST recipes?? It seems like every one I've ever made from there turns out wonderful.

As usual, I'll post the modified recipe in it's entirety at the bottom of the post.

First off, preheat your oven to 350. Then, get out two bowls. In our first bowl, we're going to combine:
• 1-1/2 cups packed brown sugar
• 1/2 cup butter, melted (This is where my major modification comes in: I use Imperial 53% vegetable oil spread. I'll explain why below)
• 2 eggs, lightly beaten (I used medium sized eggs without a problem.)
• 1 teaspoon vanilla extract (I use the imitation vanilla extract because I am cheap.)


Mix it all up until it looks like this.

So now you're wondering... why not butter? Why Imperial? a) It was the only thing I had in the fridge at the time. And the box even says "Great for Baking!". Ha. b) The recipe calls for 1/2 cup of butter. A 1/2 cup is a whole stick of butter, and I don't know if you've seen the price of butter recently, but I like to make things stretch and a whole stick of butter used on one dish isn't stretching it in my book. PLUS, I believe that butter would probably make these very flat when cooked. The veg oil spread does provide a bit of density. c) Related to the price of butter - this whole box (4 1/2 cup sticks) is only 79 cents at my local Save-A-Lot. Score in my book! It's this box if you're not familiar.

So back to the baking! haha. In your second bowl, you're now going to combine:
• 1- 1/2 cups of all purpose flour
• 1/2 teaspoon of baking powder (not baking soda!!)
• 1/2 teaspoon of salt

Mix well. You'll end up with this:


Before combining the two bowls, get 1 cup of chocolate chips ready to go. I use semi-sweet. Combine the flour bowl into the liquid bowl. Mix a little bit, then add your chocolate chips in and continue to mix until the flour is all combined in.


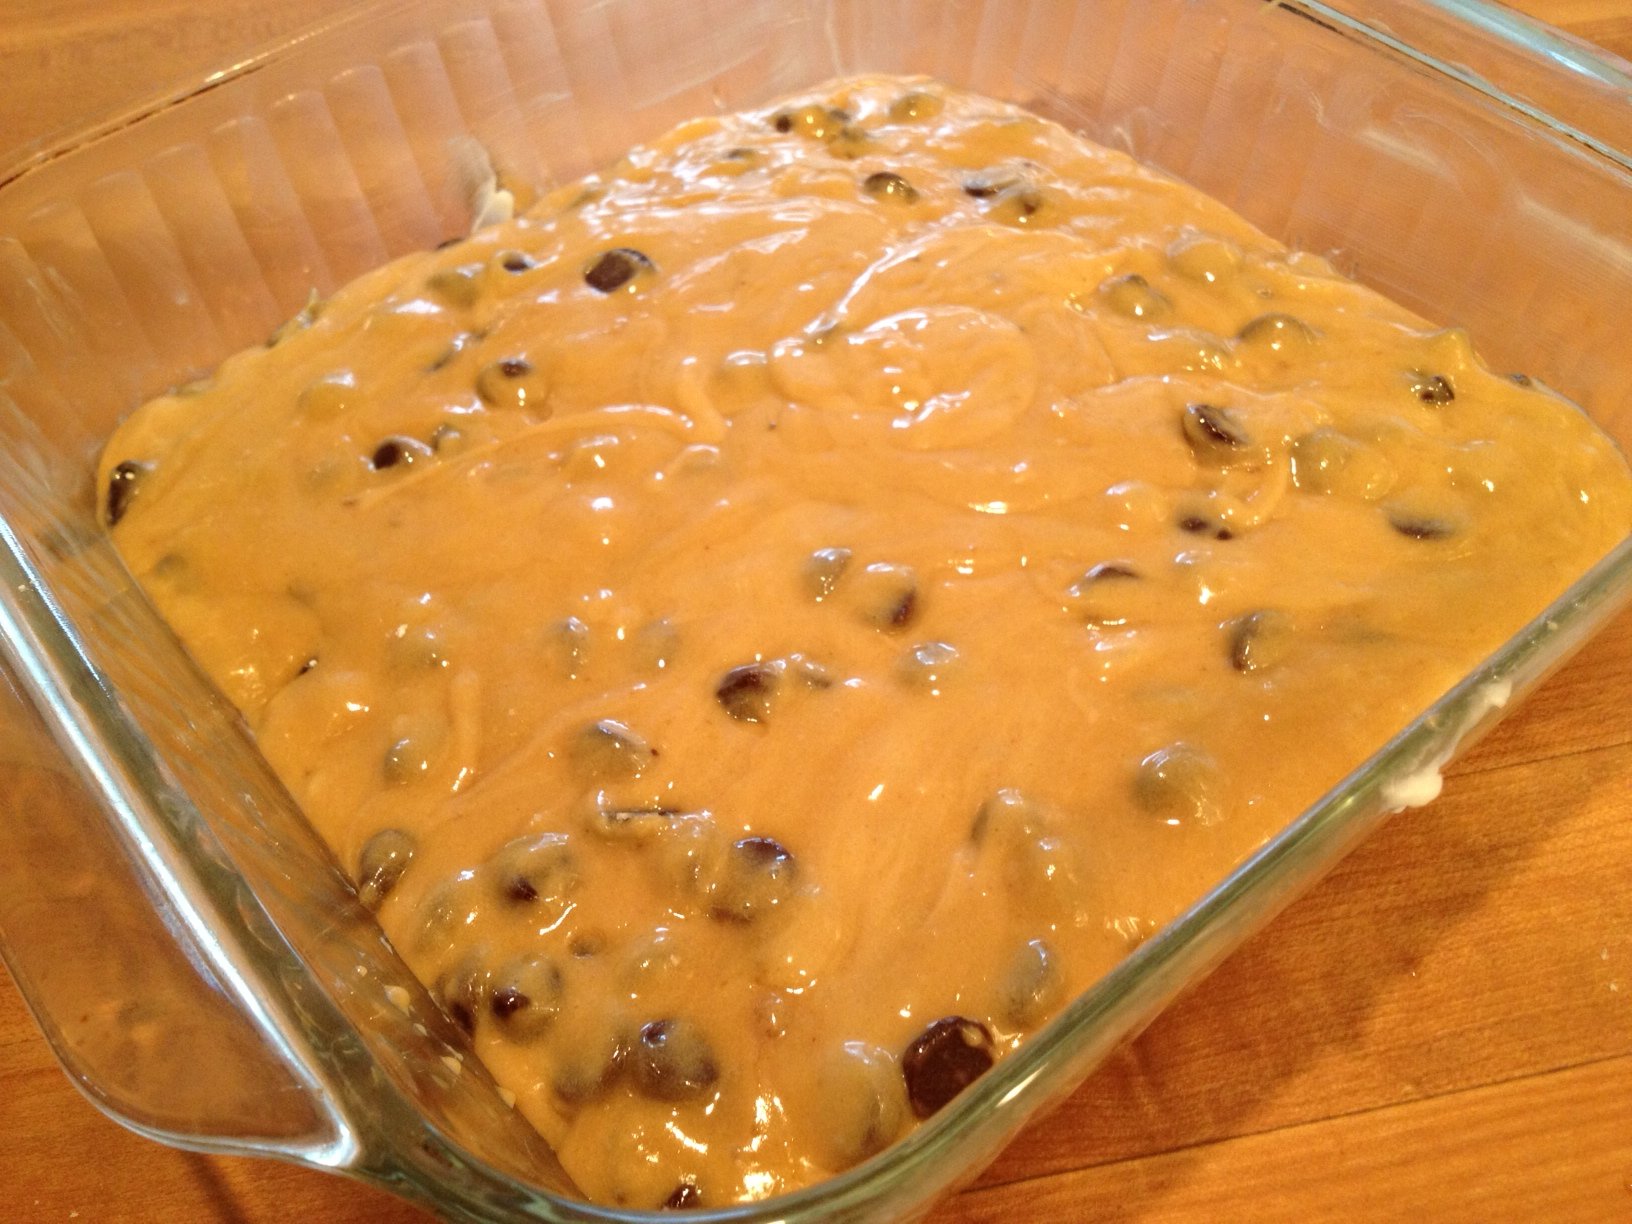
Your oven should be preheated to 350 at this point. This is another modification I did - I used a square glass baking dish (it's either 9x9 or 8x8... I'd tell you but it's filled with these blondies right now ;)) instead of the 13x9 the original recipe calls for. Why? I really wanted dense blondies. These are a little more than an inch thick when they're done and it makes for just a really awesome bite. So lightly grease up your dish, whatever you decide... I use Crisco to grease my dishes for baking. Then, using your spatula, empty the yummy looking mix into the dish.


Oh yum.

Another modification coming up... the original recipe calls for 18-20 minutes at 350. Maybe it's my oven, maybe it's because I made these a lot thicker by using a 8x8 or 9x9 vs a 13x9, but there is NO CHANCE these are done in 18-20 minutues. If you're going to do a 13x9, 18-20 minutes is a good starting point. If you're doing a smaller dish like me, I did 22 minutes normally, then used my "speed bake" function on my oven for another 9-10 minutes. You're really just going to have to check this one towards the end. If you don't have a speed bake option on your oven, I'm going to guess these take about 25-30 minutes normally, maybe even 30-35. This is really not a quick cooking recipe but it is so quick to put together, you've got to forgive it a little. ;) Insert a toothpick in the middle when you think it's close - if the toothpick comes out generally clean (I inserted it right into a chocolate chip once... whoops) you're go to go. They cook a little bit more in the pan when out of the oven.

After they're done...
In my household, these don't even last long enough for me to get a decent picture! haha! You can see the awesome top layer and the dense middle in this picture though. Enjoy! They're great even days afterwards (if they last that long! ;))

Chocolate Chip Blondies - Modified for Budgets!
  • 1-1/2 cups packed brown sugar
  • 1/2 cup butter, melted (Or spread/margarine)
  • 2 eggs, lightly beaten (Medium size is fine)
  • 1 teaspoon vanilla extract (Imitation is good too)
  • 1-1/2 cups all-purpose flour
  • 1/2 teaspoon baking powder
  • 1/2 teaspoon salt
  • 1 cup (8 ounces) semisweet chocolate chips
Directions:
In a large bowl, combine the brown sugar, butter, eggs and vanilla just until blended. Combine the flour, baking powder and salt; add to brown sugar mixture. Stir in chocolate chips.
Spread into either a greased 13-in. x 9-in. baking pan and bake at 350° for 18-20 minutes, or in a smaller square baking pan and bake at 350° for 30-35 minutes. Either way, bake until a toothpick inserted near the center comes out clean.

Thanks for following along!
Showing posts with label chocolate chips. Show all posts

Thursday, December 27, 2012

Chocolate Peanut Butter Maple Bacon Fudge


No, that second-to-last word in the title is not a misprint. 
BACON.
Yum.

I was looking for something to supplement my younger brother's gift, and goodies for my friend's treat baskets this Christmas. Something different. Something a little strange but in a strangely good way. It turns out that Chocolate Peanut Butter Maple Bacon Fudge (say THAT 10 times fast!) was just what I was looking for.

You should probably give this out as gifts next year or ladies! Make this for your hubby/significant other this Valentine's Day. It's easy and men love bacon and chocolate (but so do I... who am I kidding.)

Let's gather your ingredients. You'll need:
• A package of bacon. I believe my package was either 12 oz or 16 oz.
• 1 1/2 cups semi-sweet chocolate chips
• 1/2 cup peanut butter chocolate chips (spend the extra dollar and get the Reese's ones. You won't regret it. I didn't really have a choice as it's the only kind my store carried but you can't beat the taste of Reese's peanut butter!)
• 1 - 14 oz can of sweetened condensed milk
• 4 TBSP of unsalted butter (I used salted as it was all I had - didn't make much of a difference.)
• 1/2 tsp maple flavoring *

You'll also need:
• A pan of some sort with the most straight up and down sides you can find. I ended up using a 12x9 French White Corningware dish.
• Crisco or Pam Spray

* A note on the maple flavoring - I didn't have it nor was I going to purchase it for 1/2 tsp - I used just a little bit of normal syrup and it turned out just fine. I don't think 1/2 tsp. of anything will make that much difference in this recipe, you really could probably even leave it out.


Grease up your pan before you get started.

Using your preferred method, crisp up your bacon. (some like baking bacon, some microwave it, and some pan fry it... I pan fried it.) You'll want to crisp it up to not where it's black but not where it's rubbery still either.
Cooking the bacon... not ready yet


When it's browned up and crispy, transfer it to a plate. Carefully blot at the grease on the bacon with a paper towel - don't burn yourself. Grease burns are no fun. I don't set a towel underneath as I cut my bacon into small pieces right on that plate with kitchen scissors, and cutting up paper towel with your bacon isn't going to taste so good.


Chop the bacon into fine pieces with your kitchen scissors. The more fine, the better.

Now, in a different pan (I used a dutch oven for this part), melt your 4 TBSP of butter, your 1 1/2 cups of semi-sweet chips, your 1/2 cup of peanut butter chips, the 14 oz can of condensed milk, and your 1/2 teaspoon of syrup. Cook and stir until melted. Make sure to cook these ingredients over medium-low heat. It melts faster than you would think! Burnt chocolate is one of the saddest and worst smelling things.

Now, add most of your bacon - reserve a little on the side for garnish on top later.

Empty your dutch oven into your greased up pan. Try not to stir the grease (especially if you used pam spray) into the fudge mixture - to move it around to fill to the edges, take your spoon and lightly dab into the fudge to make it spread.

*drool*
Take the rest of the bacon you had reserved and spread it on top of the fudge. Hubba hubba.

Here's the best part - no baking! Let it cool for a few minutes, then cover it with aluminum foil and stick in the fridge. You'll want to give it at least 4 hours to set up, but overnight is better.

I was able to cut this into about 54 1x1 squares, so PLENTY to go around! And I may have had a piece or two while cutting it up. ;)


Thanks for following along! Let me know how this turned out for you! And try not to eat the whole pan! (I won't judge though if it happens. Ha! ;)

Chocolate Peanut Butter Maple Bacon Fudge
Adapted from Justapinch.com

Ingredients:
• A package of bacon. I believe my package was either 12 oz or 16 oz.
• 1 1/2 cups semi-sweet chocolate chips
• 1/2 cup peanut butter chocolate chips
• 1 - 14 oz can of sweetened condensed milk
• 4 TBSP butter (salted or unsalted)
• 1/2 tsp maple flavoring or syrup

 Directions:
1) Coat pan with Pam spray or Crisco. It can really be whatever size pan you want - just try to find the one with the straightest sides. I used a 12x9.
2) Cook your bacon until crispy. Move bacon to plate when complete, dab at grease with paper towel, chop into fine pieces.
3) To a different pan (not your bacon pan, I suggest a dutch oven), melt your remaining ingredients over medium-low heat.
4) When melted, remove from burner and add almost all bacon. Reserve a little for garnish.
5) Carefully scoop fudge into prepared greased pan. Jiggle to get the fudge to the edges or make indentations to get the fudge to move - just try not to mix the Pam spray or Crisco into the fudge.
6) Add remaining bacon pieces on top.
7) Cover with tinfoil, refrigerate for at least 4 hours, preferably overnight.


Tuesday, October 23, 2012

Chocolate Chip Blondies - For Budgets!

Well, there is a new favorite dessert in town... these chocolate chip blondies are seriously to die for. At night, we often crave a little sweet - and I'm often torn between making the yummy, taking the time, or sometimes I just don't have all of the ingredients. These blondie bars are almost like a cookie bar but have the density and the softness of a brownie. Have you ever had a cookie bar that you've almost busted a tooth on? That won't happen with these. These are soft but sturdy enough to hold in your hand.

The original recipe is from Taste of Home. I've adapted the original and made a few modifications. Don't you agree that Taste of Home has the BEST recipes?? It seems like every one I've ever made from there turns out wonderful.

As usual, I'll post the modified recipe in it's entirety at the bottom of the post.

First off, preheat your oven to 350. Then, get out two bowls. In our first bowl, we're going to combine:
• 1-1/2 cups packed brown sugar
• 1/2 cup butter, melted (This is where my major modification comes in: I use Imperial 53% vegetable oil spread. I'll explain why below)
• 2 eggs, lightly beaten (I used medium sized eggs without a problem.)
• 1 teaspoon vanilla extract (I use the imitation vanilla extract because I am cheap.)


Mix it all up until it looks like this.

So now you're wondering... why not butter? Why Imperial? a) It was the only thing I had in the fridge at the time. And the box even says "Great for Baking!". Ha. b) The recipe calls for 1/2 cup of butter. A 1/2 cup is a whole stick of butter, and I don't know if you've seen the price of butter recently, but I like to make things stretch and a whole stick of butter used on one dish isn't stretching it in my book. PLUS, I believe that butter would probably make these very flat when cooked. The veg oil spread does provide a bit of density. c) Related to the price of butter - this whole box (4 1/2 cup sticks) is only 79 cents at my local Save-A-Lot. Score in my book! It's this box if you're not familiar.

So back to the baking! haha. In your second bowl, you're now going to combine:
• 1- 1/2 cups of all purpose flour
• 1/2 teaspoon of baking powder (not baking soda!!)
• 1/2 teaspoon of salt

Mix well. You'll end up with this:


Before combining the two bowls, get 1 cup of chocolate chips ready to go. I use semi-sweet. Combine the flour bowl into the liquid bowl. Mix a little bit, then add your chocolate chips in and continue to mix until the flour is all combined in.


Your oven should be preheated to 350 at this point. This is another modification I did - I used a square glass baking dish (it's either 9x9 or 8x8... I'd tell you but it's filled with these blondies right now ;)) instead of the 13x9 the original recipe calls for. Why? I really wanted dense blondies. These are a little more than an inch thick when they're done and it makes for just a really awesome bite. So lightly grease up your dish, whatever you decide... I use Crisco to grease my dishes for baking. Then, using your spatula, empty the yummy looking mix into the dish.


Oh yum.

Another modification coming up... the original recipe calls for 18-20 minutes at 350. Maybe it's my oven, maybe it's because I made these a lot thicker by using a 8x8 or 9x9 vs a 13x9, but there is NO CHANCE these are done in 18-20 minutues. If you're going to do a 13x9, 18-20 minutes is a good starting point. If you're doing a smaller dish like me, I did 22 minutes normally, then used my "speed bake" function on my oven for another 9-10 minutes. You're really just going to have to check this one towards the end. If you don't have a speed bake option on your oven, I'm going to guess these take about 25-30 minutes normally, maybe even 30-35. This is really not a quick cooking recipe but it is so quick to put together, you've got to forgive it a little. ;) Insert a toothpick in the middle when you think it's close - if the toothpick comes out generally clean (I inserted it right into a chocolate chip once... whoops) you're go to go. They cook a little bit more in the pan when out of the oven.

After they're done...
In my household, these don't even last long enough for me to get a decent picture! haha! You can see the awesome top layer and the dense middle in this picture though. Enjoy! They're great even days afterwards (if they last that long! ;))

Chocolate Chip Blondies - Modified for Budgets!
  • 1-1/2 cups packed brown sugar
  • 1/2 cup butter, melted (Or spread/margarine)
  • 2 eggs, lightly beaten (Medium size is fine)
  • 1 teaspoon vanilla extract (Imitation is good too)
  • 1-1/2 cups all-purpose flour
  • 1/2 teaspoon baking powder
  • 1/2 teaspoon salt
  • 1 cup (8 ounces) semisweet chocolate chips
Directions:
In a large bowl, combine the brown sugar, butter, eggs and vanilla just until blended. Combine the flour, baking powder and salt; add to brown sugar mixture. Stir in chocolate chips.
Spread into either a greased 13-in. x 9-in. baking pan and bake at 350° for 18-20 minutes, or in a smaller square baking pan and bake at 350° for 30-35 minutes. Either way, bake until a toothpick inserted near the center comes out clean.

Thanks for following along!

Labels

Flickr Images

Like us on Facebook

Popular Posts


Little Oak Creations Template by Ipietoon Cute Blog Design

Blogger Templates